
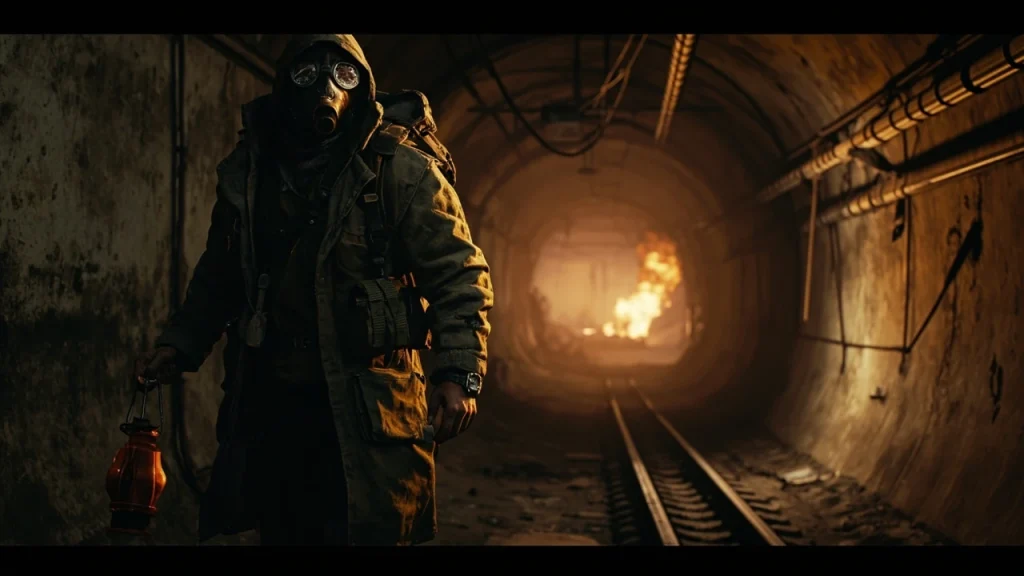
Metro Exodus walkthrough: chapter-by-chapter guide for the campaign
Metro Exodus is the 2019 first-person shooter from 4A Games that turns a linear subway horror series into a year-long journey across post-apocalyptic Russia. The campaign follows Artyom and the Spartan Order as they leave the Moscow metro behind aboard the Aurora, traveling from the irradiated ruins of Moscow to the Volga, the Caspian, the Taiga, the Dead City, and finally the frozen Yamantau. Unlike Metro 2033 and Last Light, the game is split into large open hubs with stealth, combat, scavenging, and moral choices layered on top of survival-crafting systems.
A practical metro exodus walkthrough has to do more than list objectives. The campaign rewards players who manage filters, gas mask, watch, and ammunition carefully, who notice when a route offers a stealth path instead of a firefight, and who understand which choices change the morale of the crew and the ending that follows. This guide is written for players who want a clean route through each chapter on Standard or Ranger difficulty, with the optional content that is genuinely worth pursuing and the side activities that can be safely skipped on a first run.
How this walkthrough is organized
The walkthrough is split into the seven main chapters of the campaign, with each section covering the main story beats, the most reliable routes through the larger hubs, the side content that is worth the detour, and the choices that affect your ending. Use the table below as a quick index, then read the chapter section for the detailed steps.
| Chapter | Setting | Primary focus | Estimated time |
|---|---|---|---|
| Prologue: Moscow | Ruined metro and surface | Tutorial combat, stealth, filters | 45-60 minutes |
| The Volga | River and swamp settlements | Stealth aboard a boat, bandit camp | 3-4 hours |
| Yamantau | Underground bunker complex | Tutorial for the Aurora and crew | 30-45 minutes |
| The Caspian | Desert and oil platform | Mobility, sniper duels, vehicle stealth | 3-4 hours |
| The Taiga | Forest and pirate base | Day/night stealth, ambush, moral choice | 3-4 hours |
| The Dead City | Ruined Novosibirsk | Vertical level design, mutants, artillery | 3-4 hours |
| Epilogue: Yamantau | Frozen fortress | Final assault, ending variation | 2-3 hours |
Times are based on Standard difficulty with light side exploration. Ranger Hardcore adds roughly 30 to 50 percent because of tougher combat and slower resource recovery, but the route itself does not change.
Core systems the walkthrough depends on
Before stepping into the first chapter, it helps to internalize the survival loop that runs through the entire campaign. Every metro exodus walkthrough strategy assumes you are working with these systems, and most failed runs come from ignoring one of them.
- Filters and gas mask. Filters are consumed when Artyom’s mask takes damage. Keep at least three spares in the quick access slots, and swap a filter the moment the visor cracks. A broken mask in a hostile area is a quick death.
- Wristwatch. The watch is your information layer. Tap it to check the time of day, current mission, and the next objective marker. In a hub map the watch is also used to sleep, which advances the clock and often unlocks new activities.
- Ammo and currency. Military grade rounds are the only universal currency. Treat them as both ammunition and money, because traders will pay handsomely for clean bullets. Avoid spending them on consumables when scavenged alternatives exist.
- Crafting. Workbenches allow you to upgrade weapons, armor, and the gas mask. Two gun-cleaning kits and one medkit can be carried at once, and bandages are unlimited if you hold a bandage to heal in real time.
- Moral points. Choices during dialogue and observation moments are tracked silently. Listening to crew conversations and making the more compassionate choice usually yields more points than the harshest option, although the system is not a simple good/evil slider.
If you keep those five systems in mind, the per-chapter guidance below will read as a series of decisions rather than a checklist of pixel-perfect jumps.
Prologue: Moscow
The opening chapter of the metro exodus walkthrough is essentially a long tutorial. 4A uses the ruins of Moscow to introduce stealth, gunplay, filter management, and the new open-feeling level design that defines the rest of the game. The first major set piece is the surface excursion with Anna, where you learn how the watch’s marker moves and how the gas mask reacts to spore clouds.
Use the following priorities:
- Do not waste military grade rounds on human enemies in the prologue. Dropped pistols, knives, and throwables handle most encounters.
- When you reach the train yard, hug the left side and move car by car. This avoids the mutant ambush in the central clearing on higher difficulties.
- After reuniting with the Spartan Order, the game gives you a silenced assault rifle and your first filter. Move the filter to the d-pad quick slot immediately.
- In the collapsed station where you must carry your torch, light flickers are scripted. Move quickly through the dark sections rather than trying to wait out the lights.
The prologue ends with a moral choice: what to do with the captured soldiers. There is no obvious “right” answer in the moment, and the choice does not lock your ending, but it does set the tone for how the rest of the crew treats Artyom. A forgiving decision lines up with the route that most players consider the canonical path.
The Volga
The Volga is the first true hub chapter. The Aurora docks at a flooded river settlement and the crew immediately splits up to find supplies. This is also the first chapter where a metro exodus walkthrough can take wildly different shapes, because the map is open and several objectives overlap.
Start by exploring the shipwreck on the eastern shore to pick up a silenced rifle and some clean ammo. From there, work the bandit camp at the bridge. The bandit leader can be eliminated quietly with a throwing knife from the rafters, which avoids a sustained firefight and saves ammunition for the river crossing later.
The Volga introduces the boat, and the game expects you to use it. The river has two main routes:
| Route | Risk profile | Recommended use |
|---|---|---|
| Main channel | Heavy pirate presence, watchtowers | Combat practice, large loot drops |
| Shallows and side creeks | Quiet, lots of debris | Stealth route, fuel and filter caches |
| Northern inlet | Mutants, strong currents | Optional, only if you need crafting parts |
Take the shallows on a first run. They lead to a small survivor camp with a workbench, a trader who buys military rounds, and a moral choice that influences the crew’s morale. The main channel can be cleared on a second playthrough once you are comfortable managing the boat under fire.
End the chapter by escorting the captured bandit leader. The decision you make about his fate is one of the more substantial moral points in the game, and it is worth paying attention to the crew’s reaction at the next campfire.
Yamantau
Yamantau is a short, linear chapter that takes place inside a Soviet-era bunker complex. It functions as the intermission between the Volga and the Caspian, and it is where the Aurora’s crew dynamics are established. There is no real exploration here. A metro exodus walkthrough that treats Yamantau as throwaway content is missing an important narrative beat, but it is correct to treat it as a low-mechanic chapter.
Focus on the small details:
- Listen to the conversations between Anna, Miller, and the new recruit during the descent.
- Pick up the audio logs scattered through the lower levels. They hint at the situation you will face at the Caspian.
- When the crew votes on their next destination, there is no choice. The vote is a scripted scene, but the conversations that follow set up the next chapter’s tone.
Mechanically, Yamantau is a reminder that the game has more scripted, level-based segments in between the hubs. Do not try to play it like an open area. The corridor-based combat is intentional and serves the pacing of the broader campaign.
The Caspian
The Caspian is the second large hub. The map is a desert scrap yard with a giant dried seabed, an abandoned oil platform, and a slave camp run by raiders. It is also the chapter where the metro exodus walkthrough starts to demand a more deliberate approach to loadouts.
Start by scouting from the ridge above the slave camp. The vantage point lets you mark targets, identify the sniper’s nest, and plan your approach. The sniper is the highest-priority target because the weapon he drops is one of the best mid-range rifles in the game, and the slave prisoners can be freed in the confusion.
Approach options for the slave camp:
- Stealth from the west. Cross the seabed at night, climb the scaffolding, and free prisoners quietly. This is the most reliable route on Ranger Hardcore.
- Direct assault from the south. Use the railgun-like experimental weapons scattered around the map. This is faster but burns through your best ammunition.
- Negotiation. There is a partial negotiation path that requires you to bring specific items to the slaver’s lieutenant. It does not avoid combat entirely, but it reduces the number of hostiles you face.
Once the camp is cleared, the game moves you to the oil platform. The platform is a long vertical level that mixes platforming with mutant combat. Take the elevator slowly, use the crossbow for the mutants on the lower decks, and save the heavy weapons for the upper deck where the final fight takes place.
The Taiga
The Taiga is the chapter most players remember because of its day/night cycle. The forest, the lumber mill, and the pirate-held ridge form a tightly designed map that rewards observation. A metro exodus walkthrough that rushes the Taiga will miss the best stealth content in the game.
Use the day/night cycle deliberately:
| Time of day | Visibility | Best activity |
|---|---|---|
| Day | High, snipers active | Long-range scouting, ranged combat |
| Dusk | Medium, mixed patrols | Approach the lumber mill |
| Night | Low, mutants active | Infiltrate the pirate base from the river |
Wait for night before approaching the pirate base. The base can be cleared almost entirely with a silenced rifle, throwing knives, and the bed you can use to fast-forward the clock. The pirate leader has a moral choice attached to him, and the decision you make here is one of the more influential in the game for the final ending.
The Taiga also contains the optional children’s camp, which is one of the more emotional beats in the campaign. It is not required, but it is a strong signal of how the crew will respond to your choices later in the game.
The Dead City
The Dead City chapter is the most complex urban environment in the campaign. The setting is the ruins of Novosibirsk, presented as a multi-tiered level with collapsed buildings, an active artillery exchange, and mutants that use the vertical space. The metro exodus walkthrough treats the Dead City as the technical peak of the game.
The chapter opens with a scripted artillery sequence. Follow the crew’s lead and use the cover points they mark. Do not try to flank during the artillery; the bombardments are scripted and lethal.
Once inside the city proper, the route splits into two main paths:
- Surface path. Stays on the rooftops and avoids most mutants. This is the recommended path on first playthrough because the rooftop sniping positions give you control of engagements.
- Subway path. Goes underground through flooded tunnels. It is faster but exposes you to mutants and limited light. It is also where most players die on Ranger Hardcore.
Near the end of the chapter there is a long stealth section on a moving train. Use the train cars for cover, do not engage the mutants on the parallel tracks, and wait for the crew to open the gate at the end of the line. After the train section, the game returns to the surface for the final approach to the central plaza, which is the most direct comparison to the early Metro games and a useful bridge to the epilogue.
Epilogue: Yamantau
The final chapter returns to the bunker complex of Yamantau for a full-scale assault. The level is linear, with a couple of large set pieces and the game’s final boss fight. A metro exodus walkthrough here is mostly about pacing rather than exploration.
Key points to remember:
- The assault starts with a long approach through a snowed-in forest. Move carefully because the enemies here are well-equipped and the lighting is intentionally bad.
- Inside the bunker, the game layers mutants on top of human combatants. Prioritize the mutants first because they deal the most damage and break your line of sight to the soldiers.
- The final boss is fought in two phases. The first phase is a long-range sniper duel. Use the elevated catwalks and the ballistic missiles scattered around the arena for cover. The second phase is a close-quarters chase, so save your medkits and filter changes for the transition.
The ending is determined by the cumulative moral points from earlier chapters. The two most common outcomes are the canonical ending, which shows the Aurora reaching safety, and the alternative ending, which implies a more ambiguous fate for Artyom. A third, much darker ending is reserved for players who consistently make the most ruthless decisions, although it requires deliberate effort to reach.
Side content that is actually worth doing
Most side content in Metro Exodus is story content, but the open hubs do include optional activities. A focused metro exodus walkthrough should not try to clear every marker on the map, because some of the optional content is time-consuming and not rewarding. The list below covers what is worth doing and what is safe to skip on a first run.
| Activity | Worth doing? | Why |
|---|---|---|
| Workbenches | Yes | Permanent weapon and armor upgrades |
| Trader runs | Yes | Clean ammo for military rounds and unique attachments |
| Audio logs | Yes | Important lore, hints at later chapters |
| Bandit outposts | Optional | Good loot but not required for completion |
| Mutant nests | Optional | Crafting parts, not required for the main path |
| Open-world collectibles | Skip on first run | Pure filler, not tied to achievements or endings |
The workbenches and traders are the most important because they are the only way to upgrade the gas mask and the silenced weapons, which are essential for the harder stealth sections in the Taiga and the Dead City.
Combat and survival tips that apply to every chapter
Because the metro exodus walkthrough is a single campaign rather than a series of disconnected missions, several habits will keep you alive across all seven chapters. These are the patterns that experienced players use and that the difficulty curve quietly assumes you have learned.
- Carry one of every ammo type. Even if you do not use them, having a few slugs, a few shells, and a few military rounds in your pack lets you trade with traders without going through a full inventory shuffle.
- Clean your guns only when needed. A dirty gun will jam at the worst possible time, but cleaning a gun mid-fight is usually worse than letting it jam once.
- Use the environment for cover, not for hiding. Bushes and tall grass break line of sight but do not hide you from snipers. Real cover is concrete, metal, and wood.
- Do not chase kills. Killing every enemy on the map is satisfying but wasteful. Most hubs respawn enemies anyway, and the ammunition you save will matter more in the next chapter.
- Sleep through time-of-day transitions. The watch lets you skip ahead several hours. Use this to avoid fighting pirates at noon or mutants at midnight.
None of these tips are unique to Metro Exodus, but the game expects you to learn them organically because the early chapters are forgiving. The late chapters are not.
Common mistakes to avoid on a first run
A first run through the campaign is where most of the avoidable deaths happen. The patterns below are the ones that the metro exodus walkthrough should call out explicitly because they are easy to fall into.
- Spending military rounds too early. They are tempting to use because they are powerful, but they are also your only reliable currency. The traders in the late game charge hundreds of rounds for the best attachments.
- Ignoring the gas mask timer. The mask does not warn you when it is about to fail. Get into the habit of checking the visor every few seconds in a hostile area.
- Fighting at the wrong time of day. Night is for stealth, day is for combat. Reversing that pattern burns through filters and medkits for no benefit.
- Skipping campfire conversations. The campfires are the moral-point checkpoints. Sitting through the conversations is how you secure the canonical ending.
- Assuming stealth always works. Some scripted encounters force combat regardless of how quiet you have been. Plan for those fights even on a stealth-focused run.
If you avoid those five mistakes, the campaign becomes a steady difficulty curve instead of the sudden wall that some players report at the Taiga and the Dead City.
How difficulty changes the walkthrough
Metro Exodus offers three main difficulty levels: Normal, Hardcore, and Ranger Hardcore. The metro exodus walkthrough above assumes Normal or Hardcore, where the resource economy is forgiving enough to support a stealth-first playstyle. Ranger Hardcore removes the HUD, reduces loot, and increases damage. The route does not change, but the priorities do.
On Ranger Hardcore, the priorities shift in the following ways:
- Use the watch more often because the on-screen objective markers are gone.
- Save military rounds exclusively for the trader, because the late-game upgrades are essential rather than optional.
- Take stealth over combat in every hub. The cost of a single firefight on Ranger Hardcore can be a full medkit and several filters.
- Do not engage the mutants in the open. Use the environment to funnel them into chokepoints and use a single shotgun blast to clear them.
The game’s two DLC expansions, The Two Colonels and Sam’s Story, are independent of the main campaign’s difficulty and can be played in either order. They assume you have already completed the main story, so the tips in this walkthrough apply to the base game only.
How this guide fits the wider Metro series
Players coming from Metro 2033 and Metro: Last Light will notice that Exodus is a structural change for the series. The 4A Games team has discussed the move away from linear tunnels toward open hubs as an attempt to give the same post-apocalyptic setting more breathing room, and the resulting design has clear trade-offs. The corridor tension of the first two games is replaced by a slower, more deliberate survival loop, and the moral-choice system is given more weight because the crew is on screen for most of the campaign. Readers interested in how the series evolved will find useful context in the broader Metro Exodus entry on Wikipedia and in the original Game Informer feature on the design changes 4A brought to the franchise, which provides useful background for this point.
For developer-leaning readers, the most useful comparison is between the linear level design of the first two Metro games and the modular hub structure of Exodus. The hub design is closer to a Metroidvania than to a traditional shooter, and the surface excursion system, the day/night cycle, and the boat mechanics are all tools that other studios have studied for similar projects. Readers exploring how design lessons from the Metro series apply to their own work can also look at how the GameDev side of the manillagames.com catalog treats adjacent genres, including the design-focused look at sandbox games in Brookhaven Roblox guide: game design secrets and the controller-driven design language in Astro Bot controller: how DualSense turns a cute platformer into a masterpiece of touch.
Quick reference: loadout by chapter
The table below summarizes the recommended loadout at the start of each chapter, assuming you have spent your resources on stealth upgrades rather than combat upgrades. A first-run player who follows this pattern will have the tools needed for both the stealth and the combat sections of every chapter.
| Chapter | Primary weapon | Secondary | Throwable | Filters |
|---|---|---|---|---|
| Moscow | Silenced pistol | Knife | 2 | 4 |
| Volga | Silenced assault rifle | Shotgun | 3 | 5 |
| Yamantau | Assault rifle | Revolver | 2 | 3 |
| Caspian | Sniper rifle | Assault rifle | 3 | 5 |
| Taiga | Silenced assault rifle | Crossbow | 4 | 6 |
| Dead City | Assault rifle | Shotgun | 4 | 6 |
| Yamantau (final) | Assault rifle | Sniper rifle | 5 | 7 |
Filter counts are a soft minimum. Carry more if you have them. The meta progression on a single playthrough is forgiving enough that you can rebuild this loadout after every trader visit.
Ending checklist
The campaign has two main endings, with a third secret ending reserved for the most ruthless run. Most players will see the canonical ending on a first run if they follow these rules:
- Listen to every campfire conversation without skipping.
- Make the compassionate choice in the Volga, the Caspian, and the Taiga.
- Save at least one of the optional crew members when the opportunity appears in the Taiga.
- Avoid killing surrendering enemies in the Dead City.
None of those choices are flagged in the UI. The game tracks them silently and reveals the outcome only in the final cutscene. Players who want the alternative ending should make the harsher choice at each of those points and accept the resulting crew morale penalties.
Frequently asked questions
How long is the Metro Exodus campaign?
The main story takes roughly 15 to 20 hours on a focused run. Players who explore the hubs, clear the optional bandit camps, and chase the audio logs usually land between 20 and 25 hours. A completionist run that includes every collectible and every workbench can reach 30 hours, but most of the additional time comes from travel rather than new content.
Is Metro Exodus playable in any order?
The main campaign must be played in chapter order, but the two DLC expansions, The Two Colonels and Sam’s Story, can be started from the main menu once the base game is complete. The DLCs use the same survival systems and can be approached independently of each other.
What is the best difficulty for a first run?
Normal is the recommended difficulty for new players because it gives enough resources to learn the survival loop without the punishing damage of Ranger Hardcore. Hardcore is a reasonable step up for players who want the survival pressure without losing the HUD, and Ranger Hardcore is best saved for a second run once the systems are familiar.
Can you play the entire campaign in stealth?
Not entirely. Several scripted encounters force combat, and the Dead City chapter has at least one extended combat sequence that cannot be avoided. The hubs, however, can be cleared almost entirely in stealth on Normal and Hardcore, which is the most efficient way to preserve military grade rounds for the traders.
Do choices in earlier chapters affect later chapters?
Yes, but the effect is subtle. The choices primarily influence the crew’s morale, which determines the dialogue options at key moments and the ending you receive. They do not lock you out of any mission or change the mechanical structure of any chapter.
Is there a point of no return in Metro Exodus?
There is no explicit warning, but the final approach to the Yamantau bunker in the Dead City chapter is effectively a point of no return. Once you cross the bridge into the central plaza, the game funnels you toward the final mission. Make sure your workbench upgrades, trader purchases, and campfire conversations are finished before that point.
What is the best weapon in the game?
For most players, the silenced assault rifle upgraded with a scope and a larger magazine is the most versatile weapon, because it handles both human enemies and mutants at medium range. The Helsing is the best weapon for mutants and electronics, while the shotgun is the best close-range option. There is no single best weapon, and the loadout depends on the chapter.
Are there missable achievements in the campaign?
There are a few achievements tied to specific choices and a few tied to the endings. The “Eternal Opportunity” achievement for using the watch to skip time is easy to miss because some players forget the watch has that function. The “Friend of the Resistance” achievement is tied to the canonical ending and is therefore also easy to miss on a ruthless run.
Does Metro Exodus have new game plus?
Yes, but the new game plus mode in Metro Exodus is limited. It carries over your weapon upgrades and most of your collectible progress, but it does not add new content or change the difficulty curve. Most players use it for a Ranger Hardcore run after their first completion.
Where can I find more GameDev-focused coverage of the Metro series?
Readers interested in the design side of the Metro series and similar survival games will find useful context in the manillagames.com catalog, including design-focused pieces on sandbox design and controller-driven platformers. The Wikipedia entry for Metro Exodus is also a good starting point for the production history and the 4A Games team behind the campaign.