
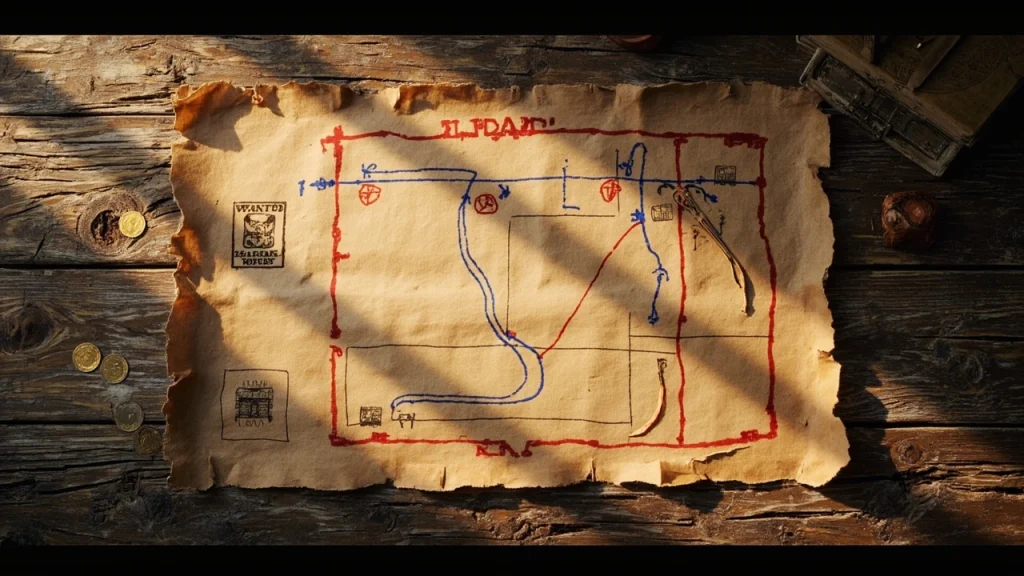
A heist mission only feels like a heist when the player can read the space. In jack hall gang map 2, the design problem is the same one a studio lead faces on any robbery prototype: the route has to be legible, the guards have to be predictable without being blind, and the reward has to feel like it was earned. Map 2 is the moment where the jack hall gang team leaves the planning screen and walks into a building with consequences, so the mission design is where production judgment shows.
This article breaks down the map as a design object, not as a fan summary. It looks at how the layout supports a stealth run, a loud run, and the messy hybrid that most players actually attempt, then walks through the data, the spawn logic, and the route decisions a developer would have to lock before this mission could ship. The goal is to make the map understandable as a piece of game design, because understanding it that way is what makes the next run feel intentional.
Jack Hall Gang Map 2 at a Glance: What the Mission Asks the Player to Do
Jack hall gang map 2 is the second operational map in the jack hall gang campaign. The gang leaves the staging area used in map 1, moves into a more urban environment, and has to break into a target structure, complete an objective inside, and extract with the loot. Compared with map 1, the playable space is tighter, the line of sight is longer, and the consequences of being seen are higher because two of the three exits funnel through the same alley network.
At its core, the mission is a short-route heist with three readable phases: approach, infiltration, and extraction. The player can approach from the south service alley, the east market street, or the rooftop line, and each approach changes how the rest of the run feels. The infiltration phase is a single connected interior with a vault, a manager’s office, and a back storage area. The extraction phase returns the player to a chosen exit, with the trade-off that the safest exit also places the player closest to a reinforcement spawn.
| Phase | Player objective | Primary risk | Time pressure |
|---|---|---|---|
| Approach | Reach a breach point without raising an alert | Patrol sight lines on the market street | None until an alert triggers |
| Infiltration | Open the vault and collect the objective item | Camera coverage and interior guards | Starts when a guard reports |
| Extraction | Reach one of three exits with the loot | Reinforcement patrol density near exits | Reinforcement timer after alert |
The map is intentionally short. A clean run takes only a few minutes, but a noisy run can take twice that because of the time spent re-positioning after a guard spots the player. That timing is the most important number on the map, and almost every design choice on jack hall gang map 2 is built around protecting it.
Why Map 2 Matters to the Campaign’s Pacing
Map 1 is a tutorial. It teaches the player how to read patrol paths, how to throw a distraction, and how the alert state changes guard behavior. By the time the player gets to map 2, the studio expects the player to plan rather than react. That expectation is why the interior is more layered, why the cameras are introduced here rather than in map 1, and why the vault requires a small mechanical sub-puzzle rather than a single key.
If map 1 is the prototype phase of the campaign, map 2 is the vertical slice. It contains all of the systems the full game will use later, but it is small enough that a designer can tune the whole mission in a single playtest. That is also why the rest of this breakdown focuses on design decisions a developer would actually have to make, not on flavor text or dialogue branches.
Reading the Map Layout: Districts, Sight Lines, and Chokepoints
The first thing a level designer has to decide is where the player can stand and what they can see from there. On jack hall gang map 2, the playable space is divided into four named districts that production uses as a shared vocabulary during reviews: the Market, the Service Alley, the Target Building, and the Rooftop Spine. These are not labels the player sees directly, but they shape the level art, the lighting pass, and the AI navigation graph.
The Market is the loudest district. It has the most ambient NPCs, the widest sight lines, and the highest baseline alert pressure. The Service Alley is the quietest district. It is narrower, partially covered, and the patrols are shorter, but the cover is also thinner, so a single bad move gets punished quickly. The Target Building is the interior objective space. The Rooftop Spine is a thin elevated path that crosses the map diagonally and gives a careful player an alternate approach that bypasses both street-level districts entirely.
| District | Patrol density | Cover quality | Noise risk | Strategic role |
|---|---|---|---|---|
| Market | High | Medium | High | Fastest approach, hardest to stay hidden |
| Service Alley | Medium | Low to medium | Medium | Reliable stealth approach |
| Target Building | Controlled by player action | High indoors | Spikes on alert | Objective space |
| Rooftop Spine | Low | High once accessed | Low until landing | Optional bypass route |
The chokepoints are the connective tissue between those districts. There are three primary chokepoints on the map, and each one is where a designer has made a deliberate trade-off between pace, risk, and player choice. The south gate links the Service Alley to the Market, the back stair links the Service Alley to the Target Building, and the skylight links the Rooftop Spine to the Target Building. The skylight in particular is the map’s most interesting design decision, because using it is faster than the back stair but exposes the player to a single camera that has to be disabled first.
Sight Line Planning as a Production Task
For a small studio, sight lines on a heist map are not an art problem first. They are a navigation problem. Each guard has a vision cone, a hearing radius, and a reporting delay. Each camera has a frustum, a sweep rate, and a hard angle. The level art then has to be authored to respect those numbers without making the space look obviously artificial. On jack hall gang map 2, the development team would have built the interior as a grid of roughly four meter cells, with sight lines carved between them, and then dressed the grid with shelves, partitions, and doors.
That workflow is worth naming because it is the same workflow used on commercial heist games at much larger scale. The level is designed from the AI outward and then dressed inward, not the other way around. If a player feels like they can read a room at a glance on map 2, it is because the AI graph was clean before any art was placed.
Guard AI on Jack Hall Gang Map 2: Patrols, Vision, and the Alert State
Guard AI is where most heist maps either feel fair or feel broken. On jack hall gang map 2, the guards are split into three roles: street patrols, interior guards, and a single supervisor who only appears after the player triggers the first alert. Each role has a different behavioral state machine, but they all share the same alert pipeline so that the player’s mental model of the system does not have to change between districts.
The alert state itself has three tiers. Tier zero is the calm state, in which guards walk their routes, look at idle animations, and ignore small disturbances. Tier one is the suspicious state, in which a guard walks to the disturbance, looks around, and only reports if the player stays in sight for more than a short window. Tier two is the combat state, in which the supervisor spawns, the patrols collapse toward the last known position, and the extraction timer starts.
| Role | Spawn location | Patrol length | Vision cone | Reports on tier |
|---|---|---|---|---|
| Street patrol | Market and Service Alley | Two to three waypoints | Narrow, forward facing | Tier one confirmed |
| Interior guard | Target Building only | Fixed waypoint loop | Wide, slow turning | Tier one confirmed |
| Supervisor | Off-map until tier two | Routes to last known position | Wide, fast turning | Always alert |
What makes this configuration work as a game design choice is the asymmetry between the roles. Street patrols have better sight lines and worse hearing. Interior guards have better hearing and worse sight lines. The supervisor is the only one with both, and that is why the supervisor is reserved for the second tier. The player can predict which role is going to react in any given situation, and that predictability is what allows a stealth run to feel planned rather than lucky.
Why the Two-Tier Alert System Feels Fair
A common mistake in heist game design is to make the first alert an instant failure state. On jack hall gang map 2, the first alert is a recoverable state, and only the second alert pushes the player into extraction. That decision reflects a production principle: a heist map is allowed to be loud, but it has to be recoverable when it gets loud. If the first alert ended the run, the player would learn to save-scum rather than learn to play, and the map would lose its replay value.
The two-tier system also gives the level designer more freedom to author dramatic moments. A player can choose to knock out a street patrol in plain sight, accept the tier-one alert, and still complete the objective, because the timer only starts on tier two. That is a deliberate design concession, and it is the kind of concession that is easier to justify to a producer when it is documented in a design document before the level is built, not after.
The Vault Sub-Puzzle: A Practical Look at the Infiltration Phase
The vault is the most concentrated design moment on jack hall gang map 2. It is also the part of the map that takes the longest to tune, because it sits at the intersection of three systems: the AI alert state, the player’s tool set, and the level’s lighting. Get any one of those wrong, and the vault either feels trivial or feels unfair.
Mechanically, the vault is a short step-sequence puzzle wrapped around a timing gate. The player has to perform three actions in the correct order, and each action is gated by a small delay. The first action requires the player to be in cover, the second requires the player to be undetected, and the third requires the player to commit to the extraction phase. None of those gates is invented arbitrarily. Each one is testing a different skill the player should have developed by the time they reach map 2.
| Step | Action | State requirement | Failure effect |
|---|---|---|---|
| One | Crack the outer door | Player in cover | Noise event, no alert |
| Two | Enter the vault code | Player undetected | Forces a restart of step two only |
| Three | Lift the objective item | Player commits to extraction | Locks extraction timer |
The important design decision is that step two only fails the step, not the whole sequence. That recovery rule is what keeps the vault from feeling like a trial-and-error gate, and it is the kind of decision a level designer has to lock in writing before the puzzle is implemented, because it is very easy to let a programmer default to a full restart on failure and never revisit it.
How the Vault Interacts with the Alert State
Step three of the vault is the trigger that locks the extraction timer. That means the player can finish steps one and two while remaining in tier one, and only start the extraction clock on their own terms. This is the single most generous design choice on jack hall gang map 2, and it is the one most often misread by players who assume the timer starts as soon as they enter the building. The decision to give the player control of the timer is what allows the rooftop approach to be viable, because a player can use the rooftop to enter silently, complete the puzzle in calm state, and only commit to extraction when they have chosen an exit in advance.
From a production standpoint, that choice is also the one that makes the map testable. A QA pass can verify the puzzle in isolation, the AI in isolation, and the extraction in isolation, because none of those systems starts before the player chooses to start it.
Approach Routes: Market, Service Alley, and the Rooftop Spine
Jack hall gang map 2 offers three viable approach routes, and a good run usually involves a deliberate choice between them before the player even crosses the outer boundary. The Market approach is the fastest and the loudest, the Service Alley approach is the slowest and the quietest, and the Rooftop Spine is the most skill-intensive because it requires a climbing action the player may not have practiced in map 1.
Each approach also changes the interior experience. A player who enters through the Market usually enters the Target Building through the front lobby, which is camera-heavy and has a wider interior footprint. A player who enters through the Service Alley usually enters through the back stair, which is camera-light but has a tighter corridor. A player who enters through the Rooftop Spine lands in the upper gallery of the Target Building, which is camera-free but has the longest line back to the vault.
| Route | Time to objective | Alert risk | Skill demand | Best for |
|---|---|---|---|---|
| Market | Fastest | High | Low mechanics, high reading | Aggressive or experienced players |
| Service Alley | Slowest | Low | Medium mechanics | First clear, careful players |
| Rooftop Spine | Medium | Low once accessed | High mechanics | Replay optimization |
The fact that all three routes are viable is not accidental. It is a deliberate decision to give the map replay value without adding new content. The same interior is reachable from three different start states, and each start state trains a slightly different player skill. On a small production, that is the cheapest way to add depth to a single map.
Why the Rooftop Spine Exists
From a level design standpoint, an alternate path that bypasses the main play space is only worth building if it teaches a different lesson than the main path. On jack hall gang map 2, the Rooftop Spine exists to teach verticality. The campaign as a whole becomes more vertical in later maps, and the rooftop here is a controlled preview of that shift. If the rooftop were only a shortcut, it would not justify the art cost. Because it also previews a system the player will need later, the cost is easier to defend in production.
For an aspiring level designer, this is one of the most important lessons in the map. An optional route should not just be a faster way to the same place. It should be a way to practice a different skill, and that skill should be one the player will need later in the game.
Extraction Logic: Why the Safest Exit Is Also the Most Dangerous
Extraction on jack hall gang map 2 is built around a deliberate contradiction. The exit closest to the vault is also the exit where the supervisor patrols once the player reaches tier two. The exit farthest from the vault is the quietest in calm state but passes through the Market, where the ambient noise of the player triggers civilian alerts. The middle exit is balanced in both directions, which is why most of the cleanest runs end there.
This design is a small study in how heist maps handle risk. A heist map with one safe exit is boring, because the player will always pick it. A heist map with three equally safe exits is also boring, because the choice does not matter. Jack hall gang map 2 sits in the middle: each exit has a real advantage and a real cost, and the player has to make the trade-off based on how their own run has gone so far.
| Exit | Distance from vault | Patrol pressure in calm | Patrol pressure in alert | Best extraction type |
|---|---|---|---|---|
| Back alley exit | Shortest | Low | High (supervisor route) | Stealth completion |
| Side street exit | Medium | Medium | Medium | Mixed approach |
| Market exit | Longest | High (civilian noise) | High | Aggressive or late alert |
For a developer reading this, the most important thing to notice is that the patrol pressure in the alert column is not the same as the patrol pressure in the calm column. The back alley is the worst exit in alert but the best in calm, and that inversion is what makes the choice meaningful. If both columns were similar, the player would always pick the same exit and the map would lose a layer of decision making.
How Extraction Forces the Player to Re-Plan
A common complaint in heist games is that the player can finish the objective and then run straight to the exit with no further planning. Jack hall gang map 2 prevents that pattern because the patrol density at each exit changes the moment the player reaches tier two. The player has to plan the exit before they finish the puzzle, not after, and that is a meaningful design constraint. It is also the kind of constraint that is easy to add and hard to remove, which is why it tends to survive into shipping builds.
From a balance perspective, this is also where the map’s replay loop lives. A player who clears the vault cleanly wants to try a different exit, and a player who failed an exit wants to try a different approach to the same exit. That pair of motivations is what keeps a single short map interesting across multiple runs.
Why the Map Is Short on Purpose
Jack hall gang map 2 is one of the shorter missions in the campaign, and that is a deliberate design decision rather than a budget compromise. Short maps are easier to balance, easier to test, and easier for a player to learn. A short map that the player can clear in a few minutes is also a map the player is willing to replay, and replay is what gives a heist campaign its long-term value.
On the production side, a short map is also cheaper to maintain. If a designer needs to retune the AI, the lighting, or the vault puzzle, they can do it in a focused playtest without scheduling a multi-day session. On a small team, that kind of iteration speed is more valuable than map length, and the campaign is structured so that the longer maps come later when the systems are stable.
- Short maps are easier to balance because the entire level can be reviewed in a single playtest.
- Short maps are easier to learn because the player can hold the whole route in memory after one or two runs.
- Short maps are easier to monetize in a live service because the player returns to them more often.
- Short maps are easier to localize because there is less dialogue and less environmental text to translate.
For a developer working on a heist prototype of their own, map 2 is a useful reference. It demonstrates that a tight, well-tuned short map can carry more design weight than a long, loosely tuned one, and that lesson generalizes to most stealth and tactical games.
Design Lessons a Developer Can Take from Map 2
The clearest lessons from jack hall gang map 2 are not about the specific guard placements or the vault code. They are about how a level designer coordinates multiple systems so that the player’s experience feels coherent. The map succeeds because the AI, the puzzle, the routes, and the extraction logic are all designed to answer the same question: how do we let the player plan, commit, and recover in a single short run?
For a developer, the practical takeaways are these. Author the AI graph before dressing the level. Use a tiered alert state instead of a binary failure state. Give the player control of any timer that locks the mission into a high-pressure phase. Build at least one optional route that teaches a different skill than the main path. And keep the map short enough that the whole thing can be reviewed in a single playtest.
- Author the AI navigation graph before placing any art, so sight lines are clean by construction.
- Use a tiered alert state so the player can recover from a mistake without reloading.
- Give the player control of the extraction timer so they can plan the exit in advance.
- Build one optional route that previews a system the player will need later in the campaign.
- Keep the mission short enough that it can be fully retuned in a single playtest.
None of those lessons is specific to jack hall gang map 2. All of them apply to any heist, stealth, or tactical mission, and they are the reason a small map can be a useful design reference for a much larger project.
How Map 2 Fits the Wider Jack Hall Gang Campaign
Map 2 does not stand alone. It is the second of three operational maps in the campaign, and the other two maps are designed to build on the systems introduced here. Map 3 introduces a moving target vehicle, which requires the player to plan an interception rather than an infiltration, and the final map introduces a time-of-day shift that changes how the AI vision system behaves. Both of those mechanics are seeded in map 2, even though they are not used here directly.
The rooftop approach, for example, is the precursor to the vertical assault in map 3. The two-tier alert system is the precursor to the timed escort in the final map. The vault step-sequence is the precursor to the convoy unlock in the same final map. Each of those systems is small on its own in map 2, but the design decision to introduce them early is what makes the later maps feel like a continuation rather than a sudden addition.
| System introduced in map 2 | First use here | Later use |
|---|---|---|
| Tiered alert state | Two-tier recovery from a single mistake | Timed escort in the final map |
| Optional vertical route | Rooftop Spine as alternate approach | Vertical assault in map 3 |
| Step-sequence objective | Vault puzzle with state-gated steps | Convoy unlock in the final map |
| Reinforcement spawn logic | Supervisor appears on tier two | Reinforcement waves in map 3 |
That is the real value of jack hall gang map 2 as a piece of game design. It is not a destination. It is a teaching layer, and the campaign is designed so that everything the player learns here compounds in the later maps. For a developer, that is the most important takeaway: a tutorial map is allowed to be simple, but a mid-campaign map has to plant the seeds of the systems the rest of the game will depend on.
Frequently Asked Questions
What is the main objective on jack hall gang map 2?
The main objective is to infiltrate the Target Building, complete the three-step vault sequence, and extract through one of the three exits without letting the alert state reach a non-recoverable tier. The objective is the same whether the player enters through the Market, the Service Alley, or the Rooftop Spine.
Which approach route is the easiest for a first clear of map 2?
For a first clear, the Service Alley approach is the most forgiving. The patrols are shorter, the ambient noise is lower, and the back stair entry into the Target Building has the lightest camera coverage. The trade-off is a longer time to the objective, but the lower alert risk makes the route easier to learn the level geometry.
How does the two-tier alert system work on jack hall gang map 2?
The first alert raises the guard state to suspicious, in which a guard investigates but does not call for reinforcement. The second alert raises the state to combat, in which the supervisor spawns, the patrols collapse toward the player’s last known position, and the extraction timer starts. The player can recover from the first alert by breaking line of sight and staying out of patrol cones for a short window.
Can the vault step-sequence be restarted after a failed step?
Only the failed step restarts. The first step is a noise event that does not raise the alert state. The second step is a state-gated action that returns the player to the start of step two on failure. The third step is a one-way commitment that locks the extraction timer once it begins.
Why is the rooftop approach riskier than it looks on map 2?
The rooftop approach bypasses the street patrols, but it requires the player to land inside the upper gallery of the Target Building, which has a long return path to the vault. The approach is also gated by a single skylight camera that has to be disabled before the player can enter silently. A player who uses the rooftop without disabling the camera will trigger a tier-one alert at the entry point.
What changes after a player reaches tier two on jack hall gang map 2?
On tier two, the supervisor enters the map, the patrols collapse toward the player’s last known position, the extraction timer locks, and the patrol density at the safest exit increases. The player’s objective shifts from completing the vault to reaching the chosen exit before the timer expires.
Is jack hall gang map 2 a tutorial map?
No. Map 1 is the tutorial. Map 2 is the first map in which the player is expected to plan rather than react. The level assumes the player can already read patrol paths, use distractions, and understand the alert state. The map’s role is to combine those skills in a short, replayable mission.
How long is a clean run of jack hall gang map 2?
A clean stealth run is one of the shortest missions in the campaign. A noisy or recovery-heavy run takes roughly twice as long because of the time spent re-positioning after alerts. The map is intentionally short so that the player is willing to replay it while learning the routes.
What is the most important design lesson from jack hall gang map 2?
The most important lesson is that a heist map should give the player control of the timer that locks the mission into high-pressure play. On map 2, the extraction timer only starts when the player commits to step three of the vault, which allows the player to plan the exit in advance. That decision is what makes the rooftop approach and the back-alley exit both viable.
Does jack hall gang map 2 introduce any system that the later maps depend on?
Yes. The tiered alert state, the optional vertical route, the step-sequence objective, and the reinforcement spawn logic are all introduced on map 2. Each of those systems is reused in map 3 and the final map, and the design decision to introduce them in a short, isolated mission is what makes the later maps feel like a continuation rather than a sudden addition.