
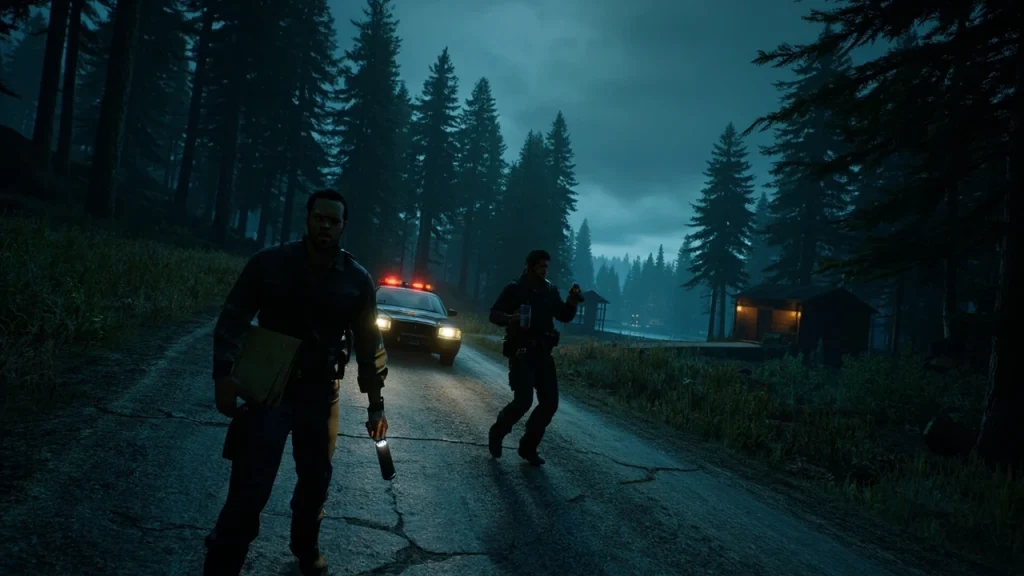
Alan Wake 2 walkthrough: how to plan a clean first run
An alan wake 2 walkthrough has to solve a specific problem the moment a player presses New Game. This is a Remedy Entertainment release that splits its main story across two protagonists, two playable timelines, and a Mind Place that behaves like a detective board more than a quest log. Saga Anderson works her case in Bright Falls and the surrounding lakes of the Pacific Northwest, while Alan Wake writes his way through the Dark Place, a shifting New York City that responds to his fiction. The cases overlap near the end, and several chapters can be started in either order after the opening. A walkthrough that treats the game as one linear sequence will mislead readers on chapter count, on where to spend their Words of Power, and on which collectibles carry over between runs.
This guide covers the structure a player needs to finish the campaign, the cases that matter for both Saga and Alan, the puzzle patterns that recur across the game, the boss fights that gate chapter progression, and the collectible categories that actually reward completion. It is built around the released version of the game and the standard difficulty. Where content has changed since the original release of Alan Wake 2, the guide flags it as version-dependent rather than guessing future patches, and the broader context of the original 2010 game is covered in the Alan Wake entry on Wikipedia for readers who want the older history.
How Alan Wake 2 is actually structured
Alan Wake 2 opens with the player choosing Saga or Alan after a short shared prologue. The choice does not lock the player into one path for the rest of the game, but the two timelines are mostly independent until they cross near the final chapters. Most players will spend roughly the first half with Saga in Bright Falls, then switch to Alan in the Dark Place for a comparable stretch before the cases converge.
The chapter system is more granular than a typical action game. Saga’s investigation is divided into named cases, each with their own map area, witness list, and set of optional threads. Alan’s chapters are framed as scenes inside a larger story he is trying to write his way out of, and the locations change every chapter. The Mind Place acts as a hub for both characters: Saga uses the motel room and her case board, while Alan uses a writer’s room that doubles as a deduction space.
| Segment | Protagonist | Setting | Typical chapter count | Core loop |
|---|---|---|---|---|
| Return, prologue | Shared | Bright Falls, Cauldron Lake | 1 chapter | Intro, sets the dual case |
| Saga’s investigation | Saga Anderson | Bright Falls, lakes, Sheriff station | 6 named cases | Investigate, board, fight, return |
| Alan’s story | Alan Wake | The Dark Place, shifting city | 5-6 scenes | Write scenes, push through nightmares |
| Convergence | Both | Shared | 2-3 chapters | Final case, shared ending |
The case list is helpful because Saga’s progression is not a single timeline of “Chapter 1, Chapter 2.” Instead, a chapter is a named investigation such as Invitation, The Heart, No Chance, and We Sing, each of which can contain several sub-locations. A walkthrough that skips this and presents the game as a flat chapter list will send readers to the wrong map when they are looking for a specific puzzle.
Pre-game setup and difficulty choices
Players should make a few decisions before they start, because some of them cannot be changed without a new save. The accessibility menu in particular is locked during cinematics, and a few options only apply from the next chapter onward.
- Pick Story mode if you want combat to be forgiving. Enemies deal and take less damage, and resources are slightly more common.
- Pick Normal if you want the intended pacing of fights and puzzles. This is the design target for the walkthrough.
- Pick Hard for a genuine resource crunch. Ammo, batteries, and healing items are scarcer, and the Taken hit harder in close quarters.
- Decide whether you want to use the Flashlight Boost toggle in the accessibility menu. It does not affect difficulty but makes the beam wider and is helpful for players who struggle with aiming.
- Set the crosshair, subtitle size, and motion blur preferences before the first cutscene. Several of these settings cannot be changed during cinematics without restarting the chapter.
One of the most common early mistakes is to skip the tutorial pop-ups in the Mind Place. Saga’s case board and Alan’s writer’s room both use the same investigation mechanic, and learning to read them in the first chapter saves time later when new evidence is added in real time. The Mind Place tutorial is short, but it is the only place the game explains how a case summary actually unlocks a new map icon.
Saga’s first case: Invitation
The Invitation case is Saga’s first investigation and the cleanest introduction to the core loop. The player arrives in Bright Falls as an FBI agent following a string of ritualistic murders. The case is small, set in and around the town, and introduces almost every system the rest of the game uses. By the end of the case, the player should be comfortable with the case board, with flashlight and gun pairing, and with the rhythm of optional side rooms.
Where to find the first clues
The investigation begins at the morgue, then moves to the Sheriff station and a small set of nearby locations. The clues the player finds here feed directly into the case board in the Mind Place, and several of them unlock new dialogue in later chapters. Players who skip the optional morgue notes tend to miss the early signal that the case connects to a broader pattern in the area.
The walkthrough order is straightforward because the case locks several doors until key clues are reviewed:
- Examine the crime scene at the morgue and pick up the case file.
- Visit the Sheriff station and talk to Deputy Thornton, then Agent Nightingale.
- Follow the lead to the Oh Deer Diner for witness statements.
- Return to the Mind Place, pin the new evidence to the board, and review the case summary to unlock the next location.
How the first combat encounters work
Combat in Alan Wake 2 leans on a flashlight plus firearm pairing. The Taken, the human-shaped enemies, can only be damaged once their shield of darkness is burned away with the beam. The walkthrough should train the player on the rhythm from the first fight: aim, burn, shoot, reposition, repeat. Skipping the burn phase is the most common reason a first fight goes sideways, since bullets alone chip the shield without breaking it.
| Enemy type | Shield behavior | Recommended loadout | Risk if ignored |
|---|---|---|---|
| Standard Taken | Single shield, breaks with one sustained burn | Pistol, short burst of beam | Low if burned before reloading |
| Taken with armor | Two-stage shield, brief pause after first break | Shotgun, longer beam hold | Mid; close range after first break |
| Ranged Taken | Shield and projectile attack | Sidearm plus a dodge behind cover | High if allowed to fire repeatedly |
| Thrower | Hurls fire or projectiles, no melee | Long-range weapon, maintain distance | High in narrow rooms |
The first Taken fight on Normal difficulty is a teaching encounter. The walkthrough should call it out specifically because new players tend to waste all of their pistol ammo on shields they have not burned yet. The intended loop is to spend flashlight battery, not bullets, on the shield phase. A useful rule of thumb for the first two cases is to keep at least half a battery bar in reserve when the next room is dark, because the next ambush is usually scripted to fire as soon as the player rounds a corner.
Saga’s case progression in Bright Falls
After Invitation, the case list opens up. Saga’s chapters are still linear in story, but the map unlocks a large connected region around the lakes, with several points of interest that can be visited in different orders. The walkthrough below follows the order the game expects, but each step is a small investigation rather than a single objective. The main path is a thin line through the map; the optional leads are what turn a 17-hour run into a 30-hour one.
Case 2: The Heart
The Heart case takes Saga out of town toward the lake region and introduces the deeper lore of Bright Falls. The narrative weight is higher than the combat difficulty. Most of the fights in this case are scripted ambushes that happen in fixed locations, so the walkthrough can warn the player where the spikes are. The Heart also introduces the first long, unlit stretch of road that returns in later cases, and learning the driving controls here saves time later.
Key things the walkthrough should highlight:
- One of the early cabins has a safe combination written in three separate notes. The combination is randomized per playthrough, so the walkthrough should explain where to find the notes, not the digits themselves.
- Several optional dialogue scenes with returning Bright Falls characters reward players who take the time to listen rather than rushing to the next objective marker.
- The first Words of Power appear here. They are spent in the Mind Place to upgrade Saga’s abilities and are limited, so the walkthrough should give a recommended order rather than a generic “spend as you like.”
Case 3: No Chance
No Chance is where the game’s open area starts to matter. The chapter unlocks a large section of map with several points of interest that can be completed out of order. The walkthrough’s job is to keep the player from backtracking for hours. The case also adds a small stealth layer: a few optional cult sites can be cleared silently with the right tool, and the player who rushes in with the shotgun will burn through ammo that the next fight requires.
A practical route through No Chance looks like this:
- Start at the Sheriff station and review the case board to identify all active leads.
- Handle the closest lead first, because the case board updates the moment a witness statement is recorded and may unlock a new map icon.
- Cluster the remaining leads by region. If two leads are on the same lake, take them in one trip rather than returning to the motel between them.
- Save the optional cult totem locations for the return trip; they are off the main road and are easy to hit on the way back to the motel.
Cases 4 to 6: building toward the climax
The remaining Saga cases expand the map further and tighten the case. The walkthrough should be careful here because the game adds a new layer of investigation: the player can now cross-reference evidence between cases, and the case board will highlight which older clues matter for the current chapter. Players who never revisit older evidence tend to miss dialogue that ties the cases together, and the deeper ending slides lean on a specific set of optional clues from these chapters.
A consistent habit through these chapters is the most useful tip. The walkthrough should recommend that the player pin every new piece of evidence to the case board, even if it does not immediately seem relevant. The case summary in the Mind Place will mark when a clue becomes critical, and missing that signal is the main reason players get stuck on a chapter for an hour. Another habit worth forming is to read the optional radio plays as soon as they unlock, because the late Saga cases quote lines from them during scripted moments.
Alan’s story in the Dark Place
Alan Wake’s chapters are structured differently. There is no open map and no investigation board. Instead, the player walks through sets that look like a film production, with Alan’s writer’s room acting as a hub. Each chapter is a new scene in a story Alan is trying to write, and the environment reflects what he is trying to put on the page. The set design is also part of the puzzle, since most Dark Place sets hide a key prop behind a wall that only appears after a specific rewrite.
The first Alan chapter
Alan starts in a version of New York that is not quite right. The walkthrough should make clear that his combat is mechanically identical to Saga’s, but his flashlight is the more important of the two tools because the Dark Place constantly punishes visibility. Aiming the beam into dark corners reveals symbols that hint at the next scene’s content, and several of these symbols are required to push the chapter forward. The first chapter is also where the player learns the difference between a “scene change” and a “rewrite,” and the wrong choice will reset a small puzzle.
The first chapter introduces:
- Alan’s writer’s room and how scenes are “written” through a series of prompts in the Mind Place.
- A handful of combat encounters designed to show that the Dark Place escalates faster than Bright Falls.
- The first puzzle that is solved by rewriting the environment through the writer’s room, not by collecting physical items.
Mid-game Alan chapters
The middle Alan chapters lean into surrealist set design. The player moves through a subway, an apartment building that loops on itself, a talk show studio, and similar settings that change as Alan rewrites them. The walkthrough’s job here is to flag the puzzles that are gated by progression, not by observation, and to warn about the resource curve. The mid-game chapters are where battery management becomes a real skill.
A few useful patterns:
- Most chapters contain a single narrative puzzle that requires placing a specific symbol on the writer’s board. The walkthrough should describe the symbol’s visual, not just the chapter, because the player may have several options available and will not know which one to pick.
- Some chapters add new mechanics temporarily, such as a sequence that uses a radio to listen to overlapping broadcasts. The walkthrough should explain the mechanic the first time it appears and then assume the player knows it later.
- Optional radio shows and TV sets give narrative color and can be tracked from the menu. They do not gate progress, but they reward players who want the full story.
Alan’s late chapters
The late Alan chapters are short and intense, and most players will need only the boss and puzzle guidance. The walkthrough should warn about resource scarcity here. Because the Dark Place is linear and the late chapters are short, players who arrive under-equipped will struggle even on Normal. A reasonable habit is to spend any leftover Words of Power on flashlight upgrades before switching to the final stretch, and to use the chapter-select option on a second save to double back for any missed batteries.
Cross-case puzzles and recurring mechanics
Several puzzle types repeat across both characters’ chapters. The walkthrough can save a lot of time by recognizing them. The patterns below are the ones that show up at least three times across the campaign, and a player who has solved one will recognize the rest.
Safe and lock combinations
Safes appear in cabins, motel rooms, and a handful of Dark Place sets. Combinations are always tied to evidence in the environment, never to an external source. The walkthrough should describe how to find the combination, not list the digits. Locked doors follow a similar pattern, but the door locks are tied to case progress rather than a number, so a walkthrough cannot solve them directly.
| Lock type | Where the combination lives | Common mistake |
|---|---|---|
| Motel safe | A note on the desk, often partially obscured | Skipping the note to read the case board instead |
| Cabin safe | Three separate notes around the room | Reading only one and guessing the rest |
| Dark Place locker | A prop on a set piece, often near a TV or radio | Searching the wrong set for the clue |
| Final-case lock | Case board evidence in the Mind Place | Forgetting to update the board after a key scene |
Light and shadow puzzles
Light puzzles appear in both timelines. The basic version requires the player to point the flashlight at a panel or symbol to activate a switch. A more complex version requires aligning two or more light sources at once, often in a Dark Place set. The walkthrough should explain the alignment pattern in a way that does not require a screenshot, because the angle of the beam depends on the player’s current camera position. A simple habit is to back the camera away from the puzzle until both light sources are on screen at the same time, which makes the alignment obvious.
Words of Power and Mind Place upgrades
Words of Power are the only meta-progression currency in the campaign, and they are finite. The walkthrough should treat them as a resource, not a collectible. They are also the only currency that does not reset on New Game Plus, which is why the recommended order below matters for players who plan to keep the save.
- Two Words of Power are hidden in Saga’s cases, and two are hidden in Alan’s. Optional areas usually hold extras.
- Saga’s recommended upgrade order: reload speed first, then flashlight battery, then a combat upgrade. This keeps her flexible in the open cases.
- Alan’s recommended upgrade order: flashlight battery first, then a combat upgrade, then reload speed. The Dark Place punishes low battery harder than low ammo.
- Save cosmetic upgrades for a second run, since they have no effect on combat and a first run is the most likely candidate for a restart.
Boss fights and how to approach them
Boss fights gate almost every chapter transition. They are scripted, which means the walkthrough can prepare the player for the fight, the arena, and the safe windows. Most bosses have a single gimmick that the player has to learn, and the rest of the fight is built around that gimmick. A walkthrough that lists the gimmick in plain language saves more attempts than any specific loadout tip.
Saga’s bosses
Saga’s bosses tend to combine shield phases with a single environmental hazard. The most common pattern is a boss that regenerates its shield until a specific environmental tool is used, such as a spotlight or a generator. Saga’s arenas are usually larger than Alan’s, with cover that is meant to be used; standing in the open is the fastest way to lose a phase.
A few rules that hold across the campaign:
- Boss arenas always contain at least one pickup. The walkthrough should mention the safe route to it because some arenas have pickups in risky positions.
- Strafing is more effective than dodging on most Saga bosses. The dodge roll has iframes but a long recovery, while strafing keeps the flashlight pointed at the boss.
- When a boss drops a usable item, the walkthrough should describe the prompt exactly. Several bosses are lost to a player who runs past the prompt because it is visually subtle.
Alan’s bosses
Alan’s bosses are more cinematic. The Dark Place tends to frame the fight inside a set piece, and the camera is locked more often than in Saga’s fights. The walkthrough should note when a fight requires the player to use the environment instead of the flashlight, because that pattern is rare in Saga’s cases. Alan’s bosses also tend to drop clues that feed back into the writer’s room, so a player who skips the post-fight cutscene will miss a line that explains the next chapter.
| Boss chapter | Primary mechanic | Recommended weapon | Common cause of failure |
|---|---|---|---|
| Saga mid-game | Shield regenerates until spotlight is on | Shotgun for stagger | Ignoring the spotlight prompt |
| Saga late-game | Two-phase, second phase adds ranged adds | Sidearm plus rifle, keep moving | Tunnel vision on the boss, missing adds |
| Alan early | Environment switches on rewrite prompts | Any weapon, beam is the point | Not reading the new symbol on the writer’s board |
| Alan late | Multi-stage with limited resources | Full ammo loadout, conserve batteries | Spending batteries too early in phase one |
Collectibles, lore, and completion
Alan Wake 2 has several collectible categories. None of them gate the ending, but several feed the New Game Plus mode and the deeper ending slides. A walkthrough should treat them as a checklist, not a requirement, and a player who only wants the base ending can safely skip most of them. The categories below are listed in roughly the order they appear in a standard playthrough.
- Nursery rhymes and cult totems: optional, scattered around Bright Falls. Each one adds a piece of the town’s history.
- Case files and manuscripts: optional, often reward a piece of the case board that the main path does not include.
- TV shows and radio plays: optional, accessible from the menu once a broadcast has been found. They are the most time-efficient collectible to chase because they do not require exploration, only triggering an interaction.
- Words of Power: required for upgrades, limited, and discussed in the upgrade section above.
Players who want to see the deeper ending should focus on the cult totems and the case files. The walkthrough should recommend a sweep of each map region after the chapter is finished, because several collectibles are inside locations that are blocked off during the main path. A reasonable target is to clear a region immediately after its main case closes, before the next case opens, since the open-area map is more forgiving at that point.
New Game Plus and what carries over
New Game Plus keeps a small set of upgrades and unlocks a higher difficulty tier. The exact list of what carries over has been adjusted since the release of the game, and the current state should be confirmed in-game before a player commits. The walkthrough’s safe assumption is that Words of Power, completed case files, and a handful of cosmetic unlocks carry over, while collectibles reset. The release window and the broader announcement context for the updated build are covered in the original announcement report from The Verge, which is useful for readers who want to see how the project was framed before launch.
For a player who wants the strongest experience, the recommended order is:
- Finish the campaign on Normal without farming collectibles.
- Use New Game Plus to mop up collectibles on Hard, with the extra difficulty as a soft completion check.
- Switch to the highest difficulty for a third run only if the player is comfortable with the boss patterns; the late-game fights are unforgiving on the hardest setting.
Common walkthrough pitfalls
Several issues repeat across player questions and are worth flagging in any walkthrough. Most of them come down to one of two mistakes: skipping the case board, or assuming a physical key exists in a scene that is actually rewritten through the writer’s room.
- Players get stuck on Saga’s mid-game cases because they did not pin all of the evidence to the case board. The board, not the journal, is the source of truth for the current lead.
- Players get stuck in Alan’s mid-game chapters because they search for items that are actually generated by the writer’s room. There is no physical key in the set; the scene is rewritten.
- Players waste Words of Power on cosmetic upgrades early. The walkthrough should rank combat upgrades above cosmetic ones for a first run.
- Players miss the final ending because they did not trigger two optional scenes in the late chapters. The walkthrough should list the chapter names of those scenes so the player can confirm they happened.
Performance and version notes
Performance varies widely by platform. The walkthrough should not promise frame rates, but it can note a few patterns that are useful for planning a session. The patterns below are consistent across the PC and console releases, but the exact numbers depend on the player’s hardware or display.
- Long, unlit corridors in the Dark Place can hitch on lower-end hardware because the lighting calculation is dense.
- Bright Falls outdoor sections are generally lighter on the GPU but heavier on streaming because the map is larger.
- Save often in the late chapters. Some boss checkpoints are spaced far apart, and a single loss can cost several minutes.
For lore, the original Alan Wake is the most useful prior context. Players who have not played it should read the in-game recap, but a short external overview is available from the Alan Wake Wikipedia article if they want the historical detail. Players who want a deeper look at the studio’s catalog can also compare this entry to Control, since the same connective tissue runs through both games.
Frequently asked questions
How long is Alan Wake 2?
A standard first run takes roughly 17 to 22 hours depending on how much optional exploration the player does. A completionist run that sweeps collectibles and reads optional radio plays typically runs closer to 28 to 32 hours. New Game Plus adds another 15 to 20 hours for a hard-difficulty sweep.
Do I need to play Alan Wake 1 first?
It is not required, but the story is more rewarding with the first game’s context. The opening recap covers the basics, and the case files inside Alan Wake 2 summarize most of the older lore. Players who skip the original should at least read the plot summary on the Alan Wake Wikipedia page before starting the late Alan chapters.
Can I switch between Saga and Alan mid-chapter?
No. Each chapter is locked to one character, and the next chapter may or may not switch. The exceptions are the prologue and the final stretch, where the two timelines interleave within a single chapter.
Are there missable achievements or endings?
The base ending is always available. A deeper ending variant is unlocked by finding a set of optional collectibles and triggering two optional scenes in the late chapters. The walkthrough flags the relevant chapter names so the player can confirm both scenes fired before the credits.
What is the best difficulty for a first run?
Normal is the design target. Story mode is more forgiving but reduces the resource pressure that makes the flashlight loop interesting. Hard is appropriate for a player who has finished a previous Remedy title and wants the resource crunch to matter.
How do I save Words of Power for the late game?
Do not spend them on cosmetic upgrades during the first three cases. Save them for the recommended upgrade order in the upgrade section above, and spend only when the case board shows a new ability is unlocked. A late spend on a weak ability is the most common regret from first-time players.
Where do I find the strongest weapons?
Stronger weapons are tied to chapter progression, not to hidden caches. A handful of optional stashes hold extra ammunition for the next chapter’s fights, and the walkthrough lists the most efficient routes to those stashes during the open-area cases.
Is there a point of no return in the campaign?
Yes. The convergence chapter triggers a save-state flag that locks the player out of optional areas in both timelines. The walkthrough calls out the chapter by name so the player can finish any open collectibles before starting it.
What changes in the updated version of the game?
The updated version adjusts a small number of balance and accessibility options, adds a New Game Plus mode, and refines a handful of cutscenes. None of these changes break a walkthrough that was written for the original release, but players on the updated version should confirm specific patch notes before assuming a number is final.
Can I play Alan Wake 2 without playing the DLC or updates?
Yes. The base campaign is a complete experience on its own, and the optional updates are additive. The walkthrough covers the base campaign and notes the update-sensitive sections so a player on the original release can still follow it without confusion.