
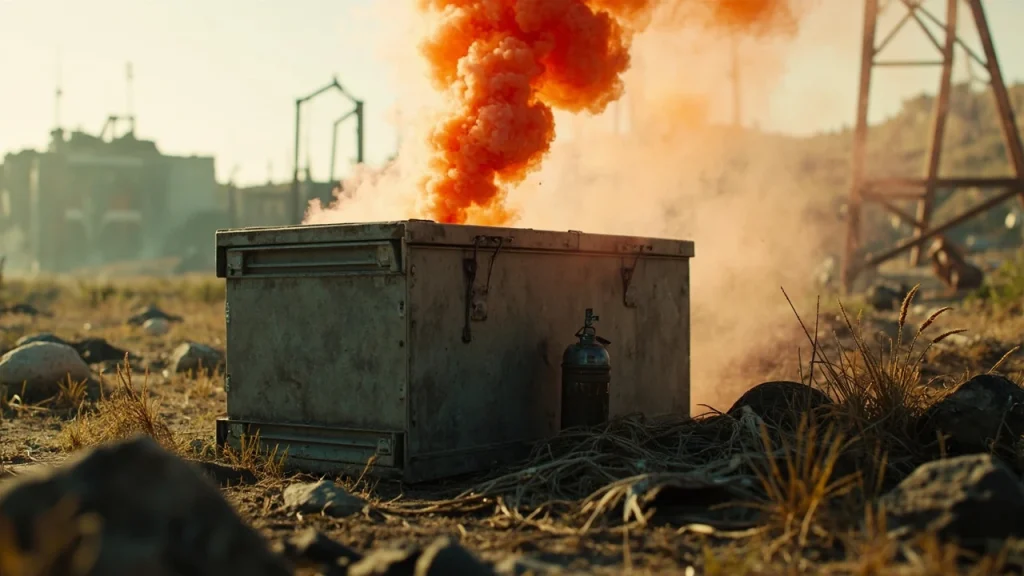
Supply drops are the loudest promise on any ARC Raiders map, and the most expensive mistake a new raider can make. The red strobe on the horizon looks like a free lunch, but every drop pod is a contest zone: machines, rival squads, and a timer that does not care about your inventory weight. Knowing which supply drop locations in ARC Raiders actually pay off, and which ones are bait, is the difference between a clean extract and a gear reset before the next match starts.
This 2026 field guide focuses on one practical question a solo player or a coordinated squad needs to answer before rotating toward a red beam: where do supply drops actually land, when do they spawn, and what is the safe play once you are there. It is built around the current Topside map family and the patterns players have observed in coordinated extraction play, and it leaves room for the studio’s ongoing balance passes rather than pretending a final design exists.
Before listing specific supply drop locations in ARC Raiders, it helps to understand what a drop is mechanically, why some pods feel rewarding and others feel like traps, and which decisions still belong to you when the match throws a curveball.
Supply drop locations in ARC Raiders and how the system actually works
A supply drop in ARC Raiders is a map-level event, not a static loot room. The system selects a location, drops a marked pod with a visible column of light, and broadcasts a directional ping on the radar for every raider in the session. From that moment, three clocks are running at once: the pod’s unlock timer, the arc machine patrol cycle, and the match’s overall storm-and-extract window. Treating the drop as a fixed landmark is the first mistake; the locations are pulled from a weighted pool each round, and the pool itself shifts with the current season’s balance pass.
The drops share a few mechanical rules that stay stable even as specific points change. The pod always contains a small set of high-tier components and a chance at a rarer schematic. A contest window opens around the pod the moment it lands, and proximity to the beam scales the chance that wandering arc machines will investigate. Finally, the radar ping is not optional, so any solo player who runs to a drop is announcing their plan to every squad in the same quadrant.
Understanding those three rules is what turns a list of coordinates into an actual strategy. The remainder of this section breaks the rules down one at a time, then connects them to the kind of decisions a solo or a squad has to make when the red beam appears on the horizon.
What a supply drop actually contains
Across the current pre-release and ongoing playtest reports, supply drops have converged on a recognizable loot profile. The pod’s inner crate holds a small bundle of high-rarity materials, a chance at a weapon or attachment blueprint, and occasionally a quest item tied to the active season’s storyline. The container itself is sealed for a short window after landing, so the first few seconds are always about position, not about looting.
Two things matter for planning. First, the drop’s contents are valuable enough to justify a real contest, which means a team that hears the radar ping will usually rotate. Second, the loot is small enough that a single squad can extract with everything if they get there first, so greed tends to outweigh caution at the pod itself.
Why every drop has a contest window
The contest window is the design lever that makes supply drops interesting. While the pod is sealed, an increasing number of arc machines drift toward the location, and the radar signature stays active. That combination turns a simple “go there and open” task into a real extraction decision: do you hold the pod and wait out the unlock, or do you crack it early and accept a worse loot roll in exchange for a faster extract.
For solo players, the contest window is the moment of highest risk. Two-man squads with a designated overwatch can often hold a pod; a lone raider usually cannot. That is why most solo guides for supply drop locations in ARC Raiders recommend treating the pod as a distraction rather than a destination unless the spawn is on top of a nearby extract corridor.
How spawn weighting changes the map each round
The supply drop system is not a fixed rotation. Each session pulls a small set of candidate locations from a weighted pool, then commits to one or two of them after the opening minutes. The pool is biased toward mid-ring landmarks and away from the extreme edges of the map, but the exact candidates change between seasons and between balance passes.
That is why a memorized callout from a previous patch can quietly become a dead spot. The categories below describe the kinds of places where drops tend to land, the local terrain that shapes each fight, and the safer extract paths that work regardless of which exact landmark the season has selected.
Reading the map: terrain families that host most supply drops
Even with shifting spawn weights, supply drop locations in ARC Raiders cluster into recognizable terrain families. Each family has its own approach vectors, sight lines, and arc-machine density. Learning the family is more durable than memorizing a single named landmark, and it scales across future seasons when individual callouts rotate.
Plateau and ridgeline drops
Plateau drops land on the raised, rocky plateaus that run along the long axis of the Topside map. They are the most visually obvious, with a clean red column that can be seen across two or three neighboring valleys, and they offer excellent sight lines for both defenders and attackers. The flat top is easy to defend with a two-man team, but the cliff edges mean there are very few safe extract paths once a third squad rotates in.
For solo players, plateau drops are usually a “watch and third-party” play rather than a direct contest. Set up on a high ridge with a long sight line, let two teams bleed against each other on the plateau, and then sweep the surviving loot on the way to a back-channel extract.
Ruined industrial yard drops
Industrial yard drops fall on the half-collapsed factory zones scattered across the mid-ring. These are the highest-loot, highest-friction locations in the current map family: dense cover, multiple interior levels, and a heavy baseline arc-machine presence even before the drop lands. The container usually lands in a central courtyard, which means the fight is rarely about reaching the pod and almost always about controlling the surrounding rooftops.
A squad that wants to actually secure a yard drop should send one player to a roof overwatch position before the pod lands, then have the remaining members move in from a covered approach. Solo players should treat these as intel sources: the radar ping tells you where the fight is happening, and you can slip in once the major contest is over.
Open field drops
Open field drops are the rarest and the most punishing. The pod lands in a flat, low-cover area, often in the center of a basin. The radar ping is the only real cover a defender has, because there is no terrain to hide behind. These spawns are usually weighted low, but when they happen they tend to resolve quickly: a coordinated squad locks the area, a few solo players peek in, and the drop is gone within two minutes.
The right play in an open field is almost always to skip the contest and pre-position for the extract that the winning squad will have to take. Open field drops are why experienced players keep an “extract predator” loadout on standby during the late phase of a match.
Edge-of-storm drops
Edge-of-storm drops land near the encroaching storm line as the match timer winds down. The design intention is clear: force a decision between chasing a high-value pod and keeping enough distance to extract safely. The contested zone is small, the timer is short, and the storm pressure means most players arrive already half-extracted.
For a coordinated squad, edge drops can be a clean late-game heist if the team commits together. For a solo, they are usually a sign to start moving toward the nearest extract regardless of the radar ping.
The Topside map at a glance: where drops tend to cluster
The exact set of named landmarks shifts with each season, but the underlying Topside layout has been stable through the public pre-release coverage and the playtest windows described in the ARC Raiders Wikipedia entry. The categories below are organized by map region, then by terrain family, so you can map a radar ping to the kind of fight you are about to walk into.
Use this section as a quick lookup before a match. After it, the next sections go deeper into timing, contest strategy, and extract planning for each terrain family.
Northern corridor
The northern corridor runs along the upper edge of the Topside map. It is dominated by plateaus and ridgelines, with a handful of ruined relay stations that the current season treats as a possible pod site. Drops in this corridor are usually visible from the central basin, which makes them a strong early-game target for squads that spawn nearby.
Solo players should treat the northern corridor as a rotation path rather than a destination. The plateaus favor coordinated overwatch, and the relay stations are dense enough with arc machines that you are likely to fight both at once.
Central basin and the ruins
The central basin holds the largest cluster of ruined industrial yards on the map. This is the part of Topside that the broader ARC Raiders preview coverage has highlighted as the highest-density contest zone, and it is where most mid-game supply drop conflicts resolve. The radar ping from a basin drop is audible across most of the map, which means the contest window usually involves three or four squads at once.
Approach from a side alley, not from the main courtyard. The ruins have enough vertical layers that a squad holding the high ground can lock a pod for the full unlock window, but only if the entry path stays covered.
Southern flats
The southern flats open up into the open field terrain family. Pods here are rare but high-contest when they do land. The lack of cover is the point: the system uses these spawns to force a “no one is safe” moment late in the match, especially when the storm ring starts pushing players toward the center.
If you hear a southern flats drop, the right call is usually to rotate away and pre-position on the extract path rather than to commit to the pod itself.
Storm edge arcology
The storm edge arcology sits on the boundary between the central basin and the late-game storm ring. It is the canonical “edge-of-storm” location, and it is the most common host for late-match pods. Players who want to contest an arcology drop need to commit to a full clear of the interior, because the storm pressure means a half-finished fight will not give you time to extract.
Timing the rotation: when drops actually appear
Knowing the supply drop locations in ARC Raiders is only half of a good plan. The other half is timing. Drops do not spawn at a fixed second; they follow a weighted window that starts after the first wave of arc machines has been disturbed, and they accelerate as the match timer winds down.
The opening quiet
For the first few minutes of a match, supply drops are intentionally rare. The system is giving solo players and squads a chance to loot the surrounding landmarks, gear up, and make their first rotation choice. If you see a drop in the opening quiet, treat it as a low-probability roll and assume another squad is already on it.
The mid-match surge
Around the halfway point of a standard match, the spawn weight for supply drops increases sharply. This is the contested window the design is built around, and it is when most players will hear at least one radar ping. The mid-match surge is also when the arc-machine patrols intensify, so the terrain around a pod becomes more dangerous even before any human squad arrives.
Plan your loadout around this window. If you are carrying a long-range marksman rifle and you only have a single close-range weapon, the mid-match surge is a poor time to contest a yard drop.
The late-match race
In the final minutes of a match, supply drops become less frequent but more decisive. A late drop almost always lands near the storm edge, and the contest window is short. The team that secures a late drop usually has a clear path to the final extract, because everyone else is too busy trying to survive the storm to contest a high-value pod.
For solo players, the late-match race is the moment to switch from “contest everything” to “extract with what you have.” Holding a late drop as a solo is a coin flip on a bad day.
Solo play versus squad play: how the decision changes
The same radar ping means very different things to a solo player and a two- or three-man squad. A useful list of supply drop locations in ARC Raiders always needs to be paired with the size of the team that intends to contest them, because the optimal play is rarely the same. The table below maps the major terrain families to a default recommendation for each team size, then the rest of the section explains why the recommendations differ.
| Terrain family | Solo recommendation | Squad recommendation | Why it differs |
|---|---|---|---|
| Plateau and ridgeline | Watch and third-party from a high ridge | Defend the plateau, hold overwatch on the access slopes | Plateaus favor coordinated sight lines; solos lack the overwatch depth |
| Ruined industrial yard | Slip in after the major contest resolves | Pre-place a roof overwatch, push from a covered alley | Yards have layered cover that rewards a designated eyes-up player |
| Open field | Skip, pre-position on the extract path | Contest only if the team is already adjacent | Open fields have no fallback cover for a solo, and a squad that arrives late is exposed |
| Edge-of-storm | Rotate toward the nearest safe extract | Commit together as a full clear of the interior | Storm pressure punishes half-committed fights; only a unified squad can win the timer race |
Why a solo player should default to distraction play
A solo player is one mistake away from a full gear reset on every drop. There is no second pair of eyes to call an approaching squad, no teammate to anchor the overwatch position, and no one to peel an arc machine off the loot crate. Treating a drop as a distraction rather than a target gives the solo player three real advantages: the radar ping tells you where the attention is, the major fight bleeds the rival squads’ ammo and healing, and the late-phase pod is often half-looted by the time the winners extract.
The right solo play is to set up on a sight line that covers the pod, wait for the contest to thin out, then sweep the leftovers on the way to a pre-chosen extract.
Why a squad should plan roles, not just positions
A squad that contests a supply drop should plan roles before the radar ping even appears. A typical two-man role split is one overwatch player on a roof or ridge and one looter on the pod itself. A three-man squad usually adds a flanker whose job is to delay the second arriving squad long enough for the loot to be secured.
The point of the role split is not to be fancy. It is to make sure the squad has an answer to the two most common losses: a rival squad rotating in from an unexpected angle, and an arc-machine patrol catching the looter mid-unlock.
Reading the radar: signals that change your plan
The radar system in ARC Raiders does not give you a literal map pin for a rival squad, but it gives you enough information to make a defensible decision. The two signals that matter most are the intensity of the drop ping and the cadence of arc-machine activity near the candidate location.
What a “fresh” drop ping sounds like
A fresh drop ping is a clean, repeating pulse. The rhythm is fast and even, and it stays constant until the pod’s seal window finishes or another major event takes the system’s attention. A fresh ping means the contest window is open and the pod is still sealed. Treat it as the highest-priority signal on the map.
If the ping is still fresh by the time you reach the terrain family, the drop has not been opened. You can still contest, but the rival squads are likely already moving.
What a “tailing” drop ping sounds like
A tailing drop ping is irregular, slower, and often mixed with the ambient pings of nearby arc machines. This is the signal that the pod has been opened, the loot is half-extracted, and the major contest is over. For a solo player, a tailing ping is the green light to move in. For a squad, it is a sign that the cost-benefit has shifted and a third-party might be the better play than a direct contest.
What arc-machine cadence tells you
Arc machines patrol in patterns, and the cadence near a candidate drop changes as the pod lands. A spike in arc activity around a fresh drop is a strong signal that the system has already started escalating the contest. It also means the rival squad that arrives first will have to deal with the machines before they can loot, which is a small window you can use to plan a counter-rotation.
Extract planning around contested drops
A secured pod is worthless if the team holding it cannot extract. The most common late-match failure is winning a supply drop fight and then bleeding the loot to a storm ring that the squad did not pre-plan for. The two questions that matter after a pod is secured are: which extract is closest, and which extract is least likely to be camped by a third party that heard the radar ping.
The two-extract rule
Before any rotation toward a candidate supply drop location, every player on the team should pick two extract points: a primary and a fallback. The primary is the closest extract in the direction of the team’s overall plan. The fallback is the next-closest extract in a different cardinal direction, because a single rival squad cannot realistically camp two opposite extract paths at once.
The two-extract rule sounds obvious, but in practice most late-match losses happen because a winning team picks a single extract and then fights through a camped chokepoint on the way out. Deciding the fallback before the drop contest starts removes that decision from the late-match pressure window.
Weight and timing of the extract
A full inventory from a high-value pod is heavier than a standard loadout. The added weight slows the extract timer and makes the carrier an easier target in a chase. A useful pre-drop decision is to set a weight cap: if the team is above the cap after the pod is secured, the looter drops the lowest-value component to keep the extract timer inside the safe window.
Common failure modes and how to avoid them
Every supply drop in ARC Raiders is a small optimization problem, and the same handful of mistakes cost most of the lost runs. The list below is not a moral judgment; it is a pattern log, and recognizing the pattern before the radar ping is the entire point of planning supply drop locations in ARC Raiders in advance.
- Committing to a drop without an overwatch. A solo or a looter-only duo that runs straight to the pod is the easiest possible target. The fix is to place a sight line before the pod is opened, not after.
- Ignoring the storm ring. A late-match drop that is technically winnable is still a loss if the team cannot reach an extract. Always run the storm timer before you run the pod.
- Carrying too much loot into the pod fight. A heavy inventory slows the rotation and the extract. Decide the weight cap before the contest starts.
- Fighting both the rival squad and the arc machines at once. A pod that lands in a yard is a double contest: the other team and the patrol. Plan which one you will let the other team handle.
- Greeding the entire pod. The last crate is rarely worth a third fight. Take the high-value components and rotate.
Building a drop-ready loadout
Loadout choices shape every supply drop decision. A long-range marksman rifle that dominates a plateau is useless in a yard, and a close-range shotgun is a liability on an open field. The table below pairs the main terrain families with a sensible default loadout, then notes the one or two alternatives that the squad can swap in based on the current season’s balance pass.
| Terrain family | Primary weapon | Secondary weapon | Utility focus | Alternative swap |
|---|---|---|---|---|
| Plateau and ridgeline | Mid- to long-range marksman rifle | Reliable mid-range assault rifle for self-defense at the pod | Spotting tools and a healing stack | Swap the marksman for a long-range energy weapon if the season favors it |
| Ruined industrial yard | Close- to mid-range weapon with a high rate of fire | Sidearm or short-range option for the loot crate defense | One deployable cover option for the looter | Swap in a shotgun for a very dense yard map |
| Open field | Mid-range weapon with a fast draw | Sniper for the long sight line | Mobility tools to close distance to the extract | Add a deployable for a defensive last stand |
| Edge-of-storm | Balanced mid-range weapon | Sidearm for the close-quarters final room | Healing stack and one deployable cover | Swap in a heavier weapon if the team is confident in the clear |
Why utility slots often matter more than weapons
Supply drop fights are decided as much by utility as by raw damage. A single deployable cover at the pod can keep a looter alive long enough to finish the unlock. A spotting tool lets the overwatch player call a rotating squad before they close the distance. And a healing stack keeps the looter in the fight through the first arc-machine contact.
The common mistake is to treat utility slots as cosmetic. They are not. They are the difference between a contested drop that survives the unlock window and a contested drop that loses it in the last second.
Adapting the plan to live patches and seasonal changes
ARC Raiders is still in active development, and the studio has been explicit that spawn weights, drop loot tables, and even the candidate landmark set will shift between seasons. A guide that pretends those details are final is a guide that will be wrong the next time the studio rebalances the system. The right way to use this article is as a framework, not a fixed list.
What to watch in the patch notes
Three lines in the patch notes are the ones that actually change the supply drop calculus. The first is any change to the spawn weight of the named landmarks; the second is any change to the contest window timer; the third is any change to the loot table, especially the chance of a quest item or a high-rarity schematic. If you re-read those three lines after every patch, the rest of the strategy described above still applies.
What to watch in your own match history
The other live source of truth is your own match history. Track which terrain family hosted the drops you contested, how the contest resolved, and which extract path you ended up taking. After ten or fifteen sessions, the personal log will outpace any static guide, because it is calibrated to the spawns and the lobby behavior you actually face.
Why the framework still matters
The terrain families, the role splits, the two-extract rule, and the loadout table are not patch-specific. They are the structural decisions that turn a randomized pod into a manageable plan. The named landmarks, the exact loot tables, and the specific radar rhythms will move; the framework is what lets you keep a working strategy across those changes.
Working with the studio’s ongoing balance
One of the useful things about the public coverage of ARC Raiders is that the studio has been open about the fact that extraction shooters live or die on their loot economy. The Game Informer preview, for example, framed the game’s broader design as an attempt to make the moment-to-moment decisions feel meaningful, and that framing extends directly to the supply drop system. A good player does not argue with the balance pass; they read it and adjust.
The practical version of that mindset is simple. Keep a personal list of which supply drop locations in ARC Raiders have paid off in your recent sessions, note which extracts you used to leave, and re-evaluate the list after every patch. The combination of the framework above and a live personal log is the most resilient way to stay effective as the design continues to evolve.
Frequently asked questions
How many supply drops can appear in a single ARC Raiders match?
Most standard matches will produce one or two supply drops, with the higher count skewed toward longer match timers and higher-density lobby populations. The exact maximum is a balance lever the studio tunes per season, so the safest answer is to expect at least one mid-match drop and to plan loadout and extract routes around that baseline.
Do supply drop locations change between solo and squad lobbies?
The terrain family is consistent across lobby sizes, but the contest behavior changes a great deal. Squad lobbies tend to push more aggressively on plateau and yard drops because they can field an overwatch, while solo lobbies often see more open-field and edge-of-storm drops resolved by extract predators rather than direct contests.
Can a solo player realistically contest a plateau supply drop?
It is possible but rarely worth the risk. A solo player who contests a plateau is fighting both the rival squad and the patrol arc machines with no second pair of eyes. The more reliable solo play is to watch the contest from a high ridge and sweep the leftovers on the way to a pre-chosen extract.
What is the safest extract path after winning a yard drop?
The two-extract rule is the safest general approach. Pick a primary extract in the direction of the team’s overall plan and a fallback extract in a different cardinal direction. In a yard drop, the primary is usually the side alley that the team used to enter, and the fallback is the opposite alley, because a single rival squad cannot camp both.
Does the radar ping tell you the exact drop location?
The radar ping gives you a directional signal and a rough distance, not a literal map pin. You still need to read the terrain family and the local landmarks to convert the ping into a real position. That is part of why learning the terrain families is more durable than memorizing a single named landmark.
How does the storm ring affect late-match supply drops?
Late-match drops tend to land near the storm edge, which means the contest window is compressed by the storm timer. A team that wins a late drop still has to win the extract race, and a half-committed fight is usually punished by the storm before the loot can be secured.
Are arc machines guaranteed to investigate a fresh drop?
Not guaranteed, but the spawn weighting and the patrol cadence both increase as the drop ages. The longer a pod sits, the more likely it is to draw a patrol, which is one of the reasons the contest window is designed to feel faster than it actually is.
Should I drop the lowest-value loot to speed up the extract?
Yes, if your team has agreed on a weight cap before the contest starts. A heavy inventory slows the extract timer and makes the carrier a more obvious target. Deciding the cap in advance removes a stressful late-match decision and keeps the team’s extract plan on schedule.
Will the studio publish a fixed list of supply drop locations?
The studio has not committed to a fixed public list, and the spawn weights are likely to keep shifting as the system is balanced. Treat any guide that promises a permanent list as outdated the moment a new season goes live, and re-check the patch notes after every update.
What is the single biggest mistake new players make around supply drops?
Running straight to the pod without an overwatch or a fallback extract. Almost every lost run traces back to a late-match decision that should have been made before the radar ping even appeared. Pick the two extracts, place the overwatch, then rotate.