
Wild Zone 3 in Pokémon Legends: Z-A: what the area actually is
Wild Zone 3 is one of the named nature reserves inside the redesigned Lumiose City that anchors the urban-wildlife loop in Pokémon Legends: Z-A. Where the earlier game in the sub-series, Pokémon Legends: Arceus, treated the wilderness as a series of open biomes connected by a hub, this new entry folds the reserves directly into a single, navigable city block, and Wild Zone 3 sits as one of the most central of those blocks. Players first reach it after the prologue that introduces the city’s relocation of wild creatures into managed zones, and it is the area where most trainers begin to see how spawns, leveling, and rewards scale as the campaign moves out of the early chapters.
What makes the zone worth a dedicated page is not simply that it exists. It is that Wild Zone 3 functions as a controlled environment for testing spawn density, encounter variety, and the timing of in-zone events. The Lumiose designers deliberately use zones like this one to teach the player the rhythm of returning to a known location at different in-game hours, watching how the spawn pool shifts, and choosing whether to push deeper into a higher-numbered zone or stay and finish local research tasks. For a player, the practical question is what to expect when entering the zone, what is worth catching, and how the loop back to the city works after each visit.
For readers approaching the game from a development or design angle, Wild Zone 3 is also a useful case study. The reserve is a small, fenced green space embedded in a dense urban grid, and the design problem it solves is straightforward: how do you keep an open-world creature-collecting game readable when the city itself is the overworld? The answer the development team uses is a repeated urban reserve template that the player learns once and then meets again as Wild Zones 4, 5, and beyond. Understanding how that template is set up in zone 3 is the cleanest way to understand the rest of the city.
Where Wild Zone 3 sits in Lumiose
Lumiose City is built as a single connected map divided into districts, and the Wild Zones are placed in pockets of green space that the city’s storyline frames as protected reserves. Wild Zone 3 occupies a mid-ring position in that layout, which has two practical consequences. First, the zone is reachable on foot from the central plaza without needing to fast travel, so the player is expected to return to it often. Second, the spawns inside the zone are tuned for trainers who have already passed the earliest chapters of the story but who are not yet ready for the highest-level reserves on the city’s edge.
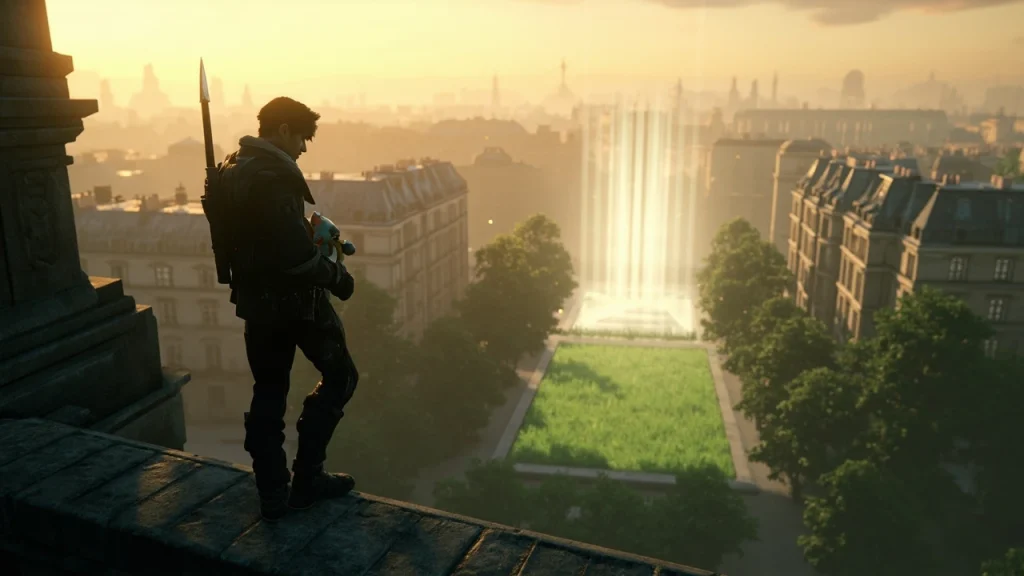
The reserve itself is bounded by the same style of energy fencing used in the other Wild Zones, with a single official entry gate. The ground is a mix of open grass, low stone walls, and a shallow stream that runs along one edge, and the camera drops into a more traditional over-the-shoulder view as soon as the player crosses the gate. Outside the fence, the surrounding streets return to the regular city view, so the visual contrast between the urban grid and the reserve is part of how the game signals where the wildlife rules apply.
For navigation, the practical tip is to identify the nearest prism tower and use it as a landmark. From the central plaza, the route to Wild Zone 3 generally passes through one of the mid-ring commercial blocks and crosses a bridge over a smaller canal. Once a trainer has visited the reserve once, the fast travel point unlocked on the first entry makes return trips trivial, which matters because much of the zone’s value comes from repeat visits at different times of day.
How Wild Zone 3 fits the Lumiose design template
The Wild Zones in Pokémon Legends: Z-A follow a shared template: a fenced reserve, a small biome inside the fence, a roster of creatures that are exclusive or near-exclusive to that reserve, and a small set of research tasks that ask the player to observe behavior rather than simply catch everything they see. Wild Zone 3 is a clean example of that template because it contains all four elements without the complications that show up in later zones. The biome is small enough to read at a glance, the roster is short enough to learn in a single sitting, and the research tasks are short enough to clear on a first visit.
From a level design perspective, this is the zone in which the player internalizes how the reserves work. The reserved template is also why the zone is a useful reference point when comparing it to Wild Zones 1, 2, and 4. If you have learned the loop in zone 3, the same loop applies elsewhere; the differences are in scale, spawn pool, and difficulty rather than in the core structure. This is also the reason that later sections of this page focus less on the zone’s unique flavor and more on how its mechanics carry over to the wider game.
The framing as protected urban wildlife, rather than as a wilderness outpost, is part of what distinguishes this entry from earlier open-zone designs in the franchise. The reserve is not at the end of a road; it is inside the city that the player already lives in, and the boundary between city and reserve is a fence rather than a horizon line. That choice influences how encounter pacing, difficulty, and reward density are tuned, and it is part of why the wild zones feel like a different design problem than a typical route.
Encounter pool and what spawns inside the zone
The roster inside Wild Zone 3 is sized for an early-to-mid campaign player, and the spawn list mixes a small group of common encounters with one or two less common ones that reward repeat visits. The zone is not designed as a single-vist area. The encounter pool is structured so that a first visit shows the trainer the common spawns, and a second or third visit at a different in-game time reveals the creatures that only appear under specific conditions. This is the same pacing pattern used across the Wild Zones, and it is one of the most useful things to learn on a first run through the city.
Common encounters in the reserve include creature types that fit a temperate, partially shaded urban biome, and they are the spawns the player can expect to see regardless of the time of day. Less common encounters tend to be tied to specific slots in the in-game schedule, such as the morning slot or the evening slot, and they tend to appear in smaller numbers or in harder-to-reach corners of the reserve. The exact composition of the spawn list is best confirmed against the in-game Pokédex, since the encounter list is the kind of detail that can shift between patches, but the structural pattern of common plus time-gated rare spawns is consistent.
For trainers optimizing their time, the practical implication is that a single visit is rarely enough. The reserve is small enough that a focused trainer can sweep it in a few minutes, and the time cost of returning later in the in-game day is low because the zone is reachable from a nearby fast travel point. Planning two or three short visits, one in each major time block, is a more efficient way to fill the zone’s portion of the Pokédex than a single long session.
| Spawn type | Where it tends to appear | When it tends to appear | What it tends to reward |
|---|---|---|---|
| Common temperate spawn | Open grass and stream edges | Any time of day | Steady Pokédex progress, basic materials |
| Time-gated rare spawn | Shaded corners and stream bends | Morning or evening slot | Evolution components, recipe unlocks |
| Research target | Specific marked location in the reserve | Triggered by an in-zone task | Research credit toward the zone’s completion reward |
| Alpha-class encounter | Patrol route inside the reserve | Rotating in-game windows | Higher-level material, single-visit trophy |
Level range and what to expect from encounters
Wild Zone 3 sits at a level band that is meant to challenge a player who has cleared the early chapters but who has not yet finished the mid-game content. The exact level numbers are not stated on the in-game map, but the practical signal is straightforward. If the player is being one-shot by encounters inside the reserve, they are likely under-leveled for the zone and should finish one or two more main story beats before returning. If the player is steamrolling every encounter, they have already passed the zone’s intended difficulty curve and will mostly be visiting for research tasks and rare spawns.
Leveling inside the reserve follows the same rule as the rest of Lumiose. Creatures that appear in the wild are at or near the player’s current badge progression, and creatures that are caught and added to a team will scale to that same band on entry to a new zone. The system is designed to keep the difficulty curve smooth rather than spike-heavy, which means a trainer who is roughly matching the recommended level for nearby story content should not need to grind before entering Wild Zone 3.
For a player who is approaching the zone from a fresh save, the best preparation is the same as for any other reserve: a balanced team with at least one answer for the common creature types in the spawn pool, enough healing items for two or three mid-fight recoveries, and a clear plan for which research tasks to prioritize on the first sweep. Going in over-prepared wastes time, and going in under-prepared is the most common reason for a frustrating first visit.
Research tasks and how the zone rewards exploration
Each Wild Zone in Lumiose comes with a short list of research tasks that the player can complete for the zone. Wild Zone 3 follows that pattern, and the tasks are designed to teach the player how observation works in the game. Typical task categories include catching a specific number of a particular creature, witnessing a particular behavior, defeating a creature using a specific move type, and finding a hidden item or NPC somewhere in the reserve. The tasks are short, but they push the player to slow down and watch the reserve rather than sprinting through it.
The reward for completing the zone’s research list is generally a recipe, a cosmetic, or a small bundle of materials. The reward is rarely the point; the point is that completing the list unlocks the next layer of the Lumiose research tree, which in turn gates additional content in later zones. This is the mechanism the game uses to keep the player moving between the city and the reserves rather than treating them as separate modes, and it is one of the cleaner uses of a research system in the franchise.
For a player who is optimizing the order of operations inside the reserve, the practical advice is to clear the visible research tasks on the first sweep, then return at a different in-game time to pick up the time-gated ones. The reserve is small enough that this pattern fits inside a single play session if the player uses fast travel efficiently, and it is the most reliable way to fully clear the zone without burning through items.
Time of day, weather, and how spawns rotate
Wild Zone 3 uses the same in-game clock as the rest of Lumiose, and the spawn pool rotates across the major time blocks. The morning slot tends to favor a different mix of creatures than the midday, afternoon, and evening slots, and at least one spawn inside the reserve is gated to a specific time block. Weather is a separate axis from time, but it interacts with spawns in a similar way: a change in weather inside the reserve can shift which creatures are active and which research tasks are completable.
For players who are trying to clear the zone’s research list efficiently, the practical workflow is to start a session in the morning, sweep the reserve for the morning-gated spawns and tasks, and then move on to city content. The evening visit can be folded into a session that includes nearby story content, so the time cost of returning is low. The reserve is also a useful place to test how the in-game clock behaves in the player’s preferred play style, since it is small and the consequences of triggering a time change are limited.
The wider point is that the spawn rotation is not arbitrary. It is a deliberate pacing tool that the development team uses to extend the useful life of a small reserve. A zone that the player could clear in a single visit would not pull them back into the city, and a zone that required no observation would not teach the player the research loop. Wild Zone 3 is sized at exactly the threshold where repeat visits are worth the time but not so many that the player feels trapped in a single biome.
How Wild Zone 3 compares with the other Lumiose reserves
Wild Zone 3 is one of several reserves scattered through Lumiose, and it sits in the middle of the lineup in terms of scale, level, and rarity. The earlier zones are smaller, easier, and tuned for the opening chapters, and the later zones are larger, harder, and tuned for the late game. Wild Zone 3 is the zone where the player first encounters a mid-game research list and a meaningful time-of-day rotation, and it is the cleanest example of the reserve template that the game uses for the rest of the campaign.
For a player who is planning their route through the city, the practical advice is to treat Wild Zone 3 as the first reserve that the player should approach seriously rather than as a passing landmark. The earlier zones are useful for learning the loop, and the later zones are useful for testing the loop under pressure, but the middle zone is where the loop is supposed to feel natural. A trainer who is comfortable with Wild Zone 3 by the time they finish its research list is in a strong position for the rest of the reserves.
| Wild Zone | Approximate position in Lumiose | Intended difficulty | Role in the campaign |
|---|---|---|---|
| Wild Zone 1 | Inner ring | Introductory | Teaches the reserve template |
| Wild Zone 2 | Inner ring | Introductory to early-mid | Reinforces time-of-day spawns |
| Wild Zone 3 | Mid ring | Early-mid to mid | First full research list, first clear time-rotation loop |
| Wild Zone 4 and later | Outer ring | Mid to late | Higher-level spawns, more complex research chains |
Entry, exit, and the connection back to the city
Wild Zone 3 has a single entry gate, and the design choice to keep entry and exit in the same place is deliberate. It gives the player a clear sense of when they have left the urban rules of the city and entered the reserve rules of the wild zone, and it gives the game a clean place to handle reward screens, research updates, and any on-entry buffs or debuffs. When the player walks back through the gate, the camera shifts back to the wider city view and the city rules reapply, including the respawn behavior of any defeated or fled creatures.
For readers interested in how this entry fits the wider series, the franchise overview of Pokémon Legends on Wikipedia is a useful starting point. It places the Lumiose-based design in the context of the sub-series as a whole, and it helps separate the elements that are unique to this entry from the elements that are shared with the earlier game in the sub-series. That separation is useful for any reader who is trying to understand the design intent behind a reserve like Wild Zone 3.
This clean boundary is part of why the reserve template works at the scale of a single city. Without a single entry and exit point, the player would have to track which city block they were in to know whether the wildlife rules applied, and the cognitive load would quickly add up. With a single gate, the player learns one rule: inside the fence, the reserve rules apply; outside the fence, the city rules apply. That single rule carries the player through every Wild Zone in the game.
For a player who is planning a route through the city, the practical implication is that Wild Zone 3 pairs naturally with adjacent city content. A common pattern is to enter the reserve for a focused sweep, exit the gate into the surrounding district, complete a nearby story beat or shop visit, and then return to the gate for a second sweep at a different in-game time. This loop keeps the player close to the city even while the reserve is the focus of the session, which is the rhythm the development team is designing toward.
Practical preparation before entering
The reserve is not dangerous in the way a high-level route is dangerous, but a small amount of preparation turns a frustrating first visit into a productive one. The first check is team composition. A balanced team with at least one answer for the common creature types in the spawn pool is more efficient than a stack of a single high-level creature, because the reserve is designed to reward observation and variety. The second check is item load. Two or three healing items, a status recovery item, and a small stock of standard Poké Balls are usually enough for a focused sweep.
The third check is time. A trainer who enters the reserve with a clear plan for which research tasks to prioritize on the first sweep will finish the zone faster than a trainer who enters with no plan and tries to do everything at once. The fourth check is the in-game clock. If the player is chasing a time-gated spawn, it is worth checking the in-game time before entry, since triggering a time change inside the reserve can be slow if the player has to wait on a long animation. None of these checks are expensive, and all of them are the kind of habit that pays off across the rest of the reserves.
- Confirm the team has at least one answer for the common creature types in the reserve’s spawn pool.
- Carry two or three healing items, a status recovery item, and a small stock of standard Poké Balls.
- Decide which research tasks to prioritize on the first sweep before entering the gate.
- Check the in-game clock if the player is chasing a time-gated spawn, and avoid entering the reserve at the wrong time of day.
- Plan a short city loop after the first sweep, including a shop visit and a story beat, before returning for a second sweep.
Common first-visit mistakes and how to avoid them
The most common first-visit mistake in Wild Zone 3 is treating the reserve as a single-visit area. The spawn pool is designed to rotate across the in-game day, and a single sweep will miss at least one research target. A close second is entering the reserve under-leveled, which is usually a sign that the player has rushed past an earlier story beat that the game expected them to complete first. A third mistake is leaving the gate open or wandering outside the fence, which causes the reserve rules to drop and the encounter to despawn.
A fourth mistake is over-grinding. The reserve is small enough that extended grinding inside the fence is rarely the fastest way to level a team, and it can interfere with the research tasks that depend on the player observing rather than battling. A fifth mistake is failing to check the in-game clock before entry, which is the most common reason that a player comes back from a session feeling like the reserve had nothing to offer. Each of these mistakes is fixable with a small amount of preparation, and each of them is a habit the game is teaching the player to develop.
The broader pattern is that Wild Zone 3 rewards planning over reflex. A trainer who enters with a clear plan, a balanced team, and a sense of the in-game clock will finish the zone’s research list in a small number of sessions, and a trainer who enters without a plan will feel like the zone is fighting back. The reserve is not difficult in the sense of being punishing, but it is structured in a way that punishes careless play.
How the zone rewards repeat visits
The reserve is designed to feel different on each visit, and that difference is the source of its long-term value. A first visit is usually about identifying the common spawns and clearing the visible research tasks. A second visit, at a different in-game time, is usually about picking up the time-gated spawns and the time-gated research tasks. A third visit, after the player has returned to the city and completed a few more story beats, is usually about the alpha-class encounter and the higher-level material that the reserve offers to a player who is now slightly above the zone’s intended level.
This pattern is the same one the game uses across all the reserves, and it is one of the reasons that the Wild Zones feel like a different design problem than a typical route. A route is a corridor; a Wild Zone is a recurring destination. The game is structured so that the player has a reason to come back to each reserve, and the reason is rarely the same twice. For a player who is planning their route through the city, the practical advice is to schedule two or three short visits to each reserve rather than a single long one.
For a reader who is interested in the design rather than the gameplay, this repeat-visit pattern is also one of the most useful things to study about the game. The reserve is small enough that a designer can map its pacing on a single page, and the pattern of first visit, second visit, and third visit is clear enough that it can be compared to similar patterns in other open-world creature-collecting games. It is also one of the cleanest examples of how a small biome can be made to feel different on each visit without a large amount of content.
Wild Zone 3 in the wider Lumiose economy
The Wild Zones are connected to the city through the crafting and shop systems, and Wild Zone 3 contributes a specific slice of materials and recipe unlocks to that economy. The reserve’s biome produces a small set of temperate-zone materials, and the research list contributes a small set of recipe unlocks. None of these rewards are large in isolation, but they are the kind of rewards that compound across the rest of the campaign, and a player who clears the zone’s research list early is in a stronger position for the rest of the game.
For a player who is planning their route through the city, the practical advice is to clear the zone’s research list as soon as the player is comfortable with the level band. The reward is not large enough to be worth a long grind, but it is large enough to be worth a focused sweep, and the recipe unlocks tend to gate other small systems in the city. The reserve is also a useful place to check the player’s current economic state, since the rewards are tuned to the same level band as the zone’s encounters.
For a designer, the wider point is that the Wild Zones are not isolated. They are nodes in a city economy, and the reserve’s contribution to that economy is part of why the player returns to the zone. A pure collection game would not need an economy layer, and a pure economy game would not need a creature layer. The game is designed at the intersection of the two, and Wild Zone 3 is one of the cleaner examples of how that intersection is implemented at the scale of a single reserve.
Designing a focused session around the reserve
A focused session around Wild Zone 3 is short, structured, and efficient. The session starts with the player checking the in-game clock and confirming which time block the player is entering. The player then enters the reserve, clears the visible research tasks, and exits through the gate into the surrounding district. The player then completes a nearby story beat or shop visit, which usually shifts the in-game time by one or two blocks. The player then re-enters the reserve and clears the time-gated research tasks before logging out.
This pattern is the cleanest way to integrate the reserve into a longer city session, and it is the pattern the game is implicitly teaching through the placement of the reserve. The reserve is in the mid-ring of the city, which means that a player who is following the campaign’s recommended path will pass the gate often. The time cost of stopping for a focused sweep is small, and the reward for stopping is large enough to make the stop feel worthwhile.
For a player who is optimizing the order of operations in the campaign, the practical advice is to schedule a focused session around the reserve early in the mid-game and to use the reserve as a checkpoint for the rest of the city’s research progress. The reserve is small enough that a single session can clear most of its research list, and the rewards from that clear are large enough to be worth the session. The wider pattern of focused, short visits is also a useful habit to develop for the rest of the game’s reserves.
What the zone does not do
Wild Zone 3 is not designed to be the most difficult reserve in the game, the largest source of materials, or the most narratively important reserve. The later Wild Zones are larger, harder, and more narratively weighted, and the city itself is the source of most of the campaign’s main story content. The reserve is also not designed to be a permanent home for the player; the city is the home, and the reserves are recurring destinations.
This scope is part of why the reserve works. A reserve that tried to be the largest, hardest, and most narratively important zone in the game would be too large to learn in a single sitting, and a reserve that was too small would not be worth a focused sweep. Wild Zone 3 is sized at exactly the threshold where the player can learn the loop in a single session and then apply the loop to the rest of the game. The reserve is not the point; the loop is the point.
For a designer, the wider point is that a small biome can carry a meaningful share of a campaign’s pacing if it is structured correctly. The reserve is small enough to be readable at a glance, but it is structured in a way that rewards repeat visits and connects to the city economy. That combination is part of what makes the Wild Zones feel like a different design problem than a typical route, and Wild Zone 3 is the cleanest example of that combination in the early-to-mid game.
Where Wild Zone 3 sits in the franchise’s open-zone lineage
The Wild Zones in Pokémon Legends: Z-A are the most recent evolution of a design pattern that the franchise has been refining across several generations. The earlier open-zone experiments in the sub-series treated the wilderness as a series of open biomes connected by a hub, and the reserves in this new entry fold the same idea into a single city. Wild Zone 3 is a useful case study because it shows how a small, fenced reserve inside a dense city can carry the same pacing role as a much larger open biome.
For a designer, the wider point is that the franchise is moving toward a model in which the city and the wilderness are part of the same map rather than two separate modes. The Wild Zones are the mechanism that the game uses to keep that single map readable, and Wild Zone 3 is one of the cleanest examples of that mechanism in action. The pattern is also a useful reference point for designers who are working on similar problems in other creature-collecting or open-world games.
Connecting the reserve to the rest of the city
The reserve is not a standalone area. It is one node in a wider network of city content, and its value comes partly from the way it connects to the surrounding district. The shops in the adjacent blocks use materials from the reserve, the NPCs in the surrounding streets reference the reserve, and the story beats in the mid-game often take place in or near the gate. The reserve is a small piece of a much larger city, and the city is what gives the reserve its long-term value.
For a player who is planning a route through the city, the practical implication is that the reserve should be approached as part of a wider city session rather than as a standalone area. The player who treats the reserve as part of the city will get more out of the zone than the player who treats it as a separate destination, and the player who plans city sessions around the reserve’s gate will save time over the course of the campaign. The reserve is small enough that this integration is easy, and the rewards from the integration are large enough to be worth the planning.
For readers who want to compare this kind of urban-reserve design to other creature-collecting games, a useful reference point is the wider design of the city. The city itself is the largest single piece of content in the game, and the Wild Zones are the mechanism that the game uses to keep the city readable. Wild Zone 3 is one of the cleanest examples of that mechanism in action, and it is the best place in the early-to-mid game to start understanding how the city and the reserves fit together.
Frequently asked questions
Where is Wild Zone 3 in Pokémon Legends: Z-A?
Wild Zone 3 is in the mid-ring of Lumiose City, reachable on foot from the central plaza through a mid-ring commercial block. Once unlocked, the gate can be reached quickly via fast travel from the nearest prism tower, which is the most efficient way to make repeat visits for time-gated spawns and research tasks.
What level should I be for Wild Zone 3?
The zone is tuned for trainers who have cleared the early chapters of the campaign but who have not yet finished the mid-game content. If the player is being one-shot by encounters, they are likely under-leveled and should finish one or two more main story beats before returning. If the player is steamrolling every encounter, they have already passed the zone’s intended difficulty curve.
Does Wild Zone 3 have time-gated spawns?
Yes. The reserve uses the same in-game clock as the rest of Lumiose, and at least one spawn is gated to a specific time block. Planning a second visit in a different time block is the most efficient way to fill the zone’s portion of the Pokédex, and the reserve is small enough that two short visits are usually enough to clear the time-gated research tasks.
What rewards does the reserve give for clearing its research list?
The research list for Wild Zone 3 typically rewards a recipe, a cosmetic, or a small bundle of materials. The reward is rarely the point; the point is that completing the list unlocks the next layer of the Lumiose research tree, which in turn gates additional content in later zones. Clearing the list early is a useful habit to develop for the rest of the campaign.
How does Wild Zone 3 differ from Wild Zones 1 and 2?
Wild Zones 1 and 2 are inner-ring reserves that are smaller, easier, and tuned for the opening chapters. Wild Zone 3 is a mid-ring reserve that is larger, harder, and tuned for the early-to-mid game. It is the first reserve where the player encounters a full research list and a meaningful time-of-day rotation, and it is the cleanest example of the reserve template that the game uses for the rest of the campaign.
Can I leave the reserve mid-fight without losing the encounter?
The reserve rules apply only inside the fence. Walking back through the gate drops the encounter and applies the city rules, which means the wild creature will despawn. The practical advice is to finish the fight or catch the creature before exiting, and to plan a return to the city after the in-zone research is complete rather than during a fight.
Is Wild Zone 3 worth revisiting after the research list is done?
Yes, but mostly for the alpha-class encounter and the time-gated rare spawns rather than for additional research credit. The reserve is also a useful place to test the in-game clock and the spawn rotation, and the surrounding district is a natural hub for nearby story content and shop visits. The wider value of repeat visits is the habit of returning to a known location at different in-game times, which pays off across the rest of the campaign.
What team composition works best inside the reserve?
A balanced team with at least one answer for the common creature types in the spawn pool is more efficient than a stack of a single high-level creature. The reserve is designed to reward observation and variety, and a balanced team gives the player more options for the research tasks that depend on specific move types or behaviors. Two or three healing items, a status recovery item, and a small stock of standard Poké Balls are usually enough for a focused sweep.
Does the reserve scale with the player’s level?
The reserve’s spawns are at or near the player’s current badge progression, and the difficulty curve is tuned to be smooth rather than spike-heavy. A trainer who is roughly matching the recommended level for nearby story content should not need to grind before entering. A trainer who is significantly above the zone’s level band will still find the reserve useful for time-gated spawns and research tasks, but the combat encounters will be straightforward.
How long does a focused sweep of Wild Zone 3 take?
A focused sweep of the reserve takes only a few minutes, and two short visits in different time blocks are usually enough to clear most of the research list. The wider session, including the surrounding district and a nearby story beat, takes longer, but the reserve itself is small enough that it does not dominate the session. Planning two or three short visits is more efficient than a single long session for most players.