
Arc raiders prickly pear: what this resource actually does
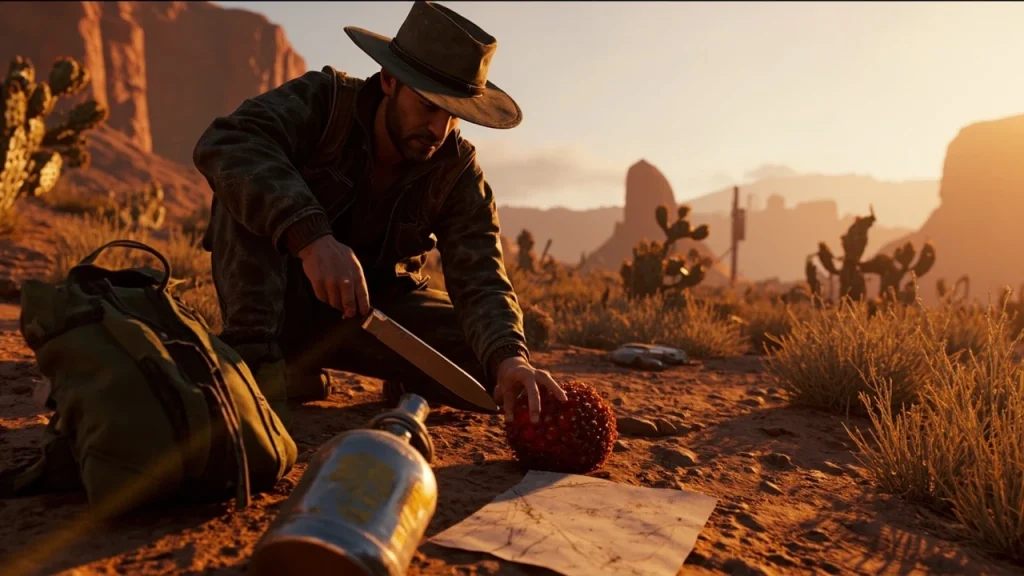
A prickly pear in Arc Raiders is a harvestable desert plant that turns rough, hostile terrain into a workable resource node. When a squad drops into a rocky basin, the bright green pads of a prickly pear stand out against the sand, and the ripe fruit at the top signals a cluster that has been growing through several extraction cycles. Picking the plant is not an idle animation. The pads, the skin, the inner pulp, and the small seeds all behave as separate ingredients inside the crafting system, and that separation is what makes the resource worth a deliberate route rather than a quick detour.
The plant is also a terrain signal. Where prickly pear grows densely, the surrounding rock usually has enough shade to support small creatures, and the ground stays cool enough to hide shallow caches. Players who learn to read those clusters end up moving more carefully through the map, and designers who place prickly pear as a visual anchor shape a more readable extraction loop. The rest of this article breaks down what the resource is in build terms, how the harvest interaction is tuned, where the clusters tend to sit on the map, and what a working squad does with the yield once the timer starts.
Because the plant sits at the intersection of gather, heal, and trade, it is one of the few Arc Raiders resources that a new player and a veteran can both plan around without changing core loadouts. The loops built on prickly pear scale from solo highland runs to three-person mesa pushes, and the same ingredient list covers all of them. That flexibility is also why the resource keeps appearing in community route plans during the public previews.
How Arc Raiders frames the prickly pear as a game asset
Every resource in Arc Raiders is built from a small asset chain: a world placement rule, a harvest interaction, an inventory item, and a recipe consumer. The prickly pear follows the same chain as other gatherables, but the values around it are tuned for slower, riskier play. Understanding those four layers makes the resource easier to plan around, both for players running a route and for designers studying extraction design.
Asset structure of a harvestable plant
Each prickly pear is a static mesh with two or three pad subdivisions, a fruit prop on top, and a small root disc that snaps to the terrain normal. The collider is a simple capsule around the main pad, not a full mesh, so players can trigger the harvest prompt without aiming precisely. A separate child object carries the fruit, which only becomes interactable when its state changes from unripe to ripe. This separation lets the team animate the pad being cut without forcing the fruit to follow unrealistic deformations.
Behind the visible mesh sits a designer data block that records how many harvests the cluster can produce, how long the regrowth cooldown runs, and which biomes can host the asset. The block also decides whether the cluster respawns on the shared map or only inside private instances, and that single flag is what gives prickly pear its place in contested routes. A block that points at the shared map turns a quiet plant into a tactical marker, because every squad sees the same node at the same coordinates during a session window.
Placement rules in the world
Arc Raiders seeds prickly pear clusters along south-facing slopes, inside dry washes, and at the edge of mesa shadows. The placement bias is intentional. South-facing slopes in the game’s hemisphere receive more direct sun, and the team has tuned the asset’s regrowth to feel like a real plant under those conditions. Players who push north-facing slopes find far fewer clusters and learn to favour the warmer, harder-to-defend terrain when they need pulp or seed.
Density is also tied to elevation. Lower basins have sparse but high-value clusters, while mid-elevation plateaus host dense but low-yield groups. The mix keeps extraction squads from camping a single bush, and it forces roaming if a squad wants enough pulp for a single craft. Designers have said in previews that the bias was tuned after playtests showed squads grinding a single node type, so the elevation spread is a deliberate balance lever.
Harvest interaction in detail
The harvest prompt appears when the player is within the capsule collider and looking at the cluster. Holding the interact button triggers a short slicing animation, then the inventory receives the ingredients. The interaction has a fixed duration, not a quick tap, and that timing matters. It is long enough that an enemy squad can rotate into line of sight before the action finishes, which is the design reason prickly pear nodes sit near cover rather than out in flat sand.
Each harvest consumes durability on the player’s cutting tool, and the loss scales with the number of pads taken. A standard knife lasts through a few clusters before it must be repaired or replaced. The repair cost is meaningful, so a squad that over-harvests without maintaining its tool loses more value than it gains. The knife durability field is one of the most often overlooked numbers in the resource chain, and a careful squad treats it the way a miner treats a pickaxe.
Inventory model and stack behaviour
The prickly pear splits into four stack types when harvested: pad, skin, pulp, and seed. Each has its own weight, stack size, and sell value. The pad is heavy and low value, the skin is light and useful for low-tier recipes, the pulp is the main craft input, and the seed is rare, light, and high value. Stacks respect the player’s carry weight, so a route that picks only pulp while leaving pads behind is the most efficient way to extract value from a dense cluster.
| Ingredient | Approx. weight | Stack size | Primary use | Notes |
|---|---|---|---|---|
| Pad | Heavy | Small | Bulk trade | Often left behind to save weight |
| Skin | Light | Medium | Low-tier recipes | Common in early missions |
| Pulp | Medium | Medium | Main craft input | Drives most consumable recipes |
| Seed | Very light | Very small | High-value trade | Drops from ripe clusters only |
The table is a planning aid, not a guarantee. The exact weights and stack sizes can shift with patches, so treat the numbers as a working baseline and recheck them after each major update. The relative pattern, that pulp is the most reliable input and seed is the rarest drop, has held across the public previews. Players who built routes around the pulp-to-seed ratio in the first playtest build have reported that the ratio still holds in the most recent update, which is a useful signal that the design is stable.
Where to find prickly pear in each biome
Arc Raiders distributes prickly pear unevenly, and the bias is part of the design. Each biome has a different density, a different predator pressure, and a different elevation band where clusters feel comfortable. A squad that learns the map layering for this plant will move with purpose, while a squad that relies on chance will keep finding empty slopes.
For players who want a wider view of the map, the same regional layering pattern is visible across other desert resources in Arc Raiders, which makes prickly pear a useful entry point for learning how the world is put together. The patterns below come from repeated runs in the public preview, and they line up with the spawn rules the developers have described in interviews.
Dry wash basins
Basins collect runoff and stay slightly cooler than open slopes, so prickly pear clusters settle near the edges where rocks give partial shade. Harvesting here is fast, but the same shade that helps the plant grow also hides roaming scavengers. A squad that pushes into a basin should send one player to the high ground first and another to the cluster itself, with the third covering the most likely rotation path. The plant is the bait, not the prize.
South-facing mesa edges
The mesa edges in the central desert biome host the densest prickly pear fields in the game. The trade-off is exposure. The fields are visible from several sightlines, and an opposing squad can spot a harvest animation from a long way off. Players who want to clear these fields usually arrive during low-traffic windows, finish the harvest quickly, and rotate before a counter-squad can close the distance. Many squads save mesa runs for the last twenty minutes of a session, when the population thins out and the contested extracts become predictable.
Highland scrub
At higher elevation, the plant grows as scattered single pads rather than full clusters. The yield per node is low, but the regrowth cooldown is shorter, and the area is rarely contested. A solo player who wants steady pulp income without a fight usually loops through two or three highland nodes per run, picking only the ripe pads and leaving the unripe ones for the next pass. The trade is volume for safety, and it works because the time saved on rotations more than makes up for the smaller harvest.
Industrial ruins
Some of the more interesting prickly pear nodes grow inside abandoned industrial sites, on broken concrete that traps a little moisture. These clusters are small, but they are also shielded from long sightlines, which makes them useful for cautious players. The catch is that the surrounding area usually has metal scrap, which attracts a different kind of contest. Industrial ruin nodes are the most common place where a prickly pear run turns into a scrap run by accident.
Harvesting mechanics a working squad uses
The prickly pear is not a passive pickup. The harvest has timing, tool cost, and inventory pressure, and a squad that ignores any of those layers burns more than it gains. The mechanics below are the ones that show up consistently in high-skill extraction play, and they map closely to the design notes that have appeared in the preview coverage of the game.
Pre-harvest setup
Before approaching a cluster, a squad should agree on a cover position, a rotation direction, and a tool responsibility. The cover position is usually ten to fifteen metres from the cluster, on the side that gives the best line of sight over the likely approach. The rotation direction is the opposite of the cover, so the squad can peel away without crossing its own line of fire. The tool responsibility is a single player who carries the cutting implement and the repair kit, because spreading that load across the squad wastes inventory space.
A short voice call before the run covers all three points in under a minute, and most experienced squads add a fourth point: an exit point on the map. Without an exit point, a squad that finds a contested cluster tends to overstay and lose the value it just picked.
During the harvest
Only one player should interact with the cluster at a time. The harvest animation locks the player in place, and a second player trying to interact will cancel the first animation and start a fresh one. The single-interaction rule also keeps the team’s combat readiness intact, because the other two players can still return fire or reposition.
The harvester should target ripe fruit first, because the seed drop is gated behind ripeness. Picking only pads is faster but yields less value, and it shortens the cluster’s regrowth window because the plant has fewer resources to recover. The ripeness flag is the most important state to watch, and many squads now treat unripe clusters as scenery rather than targets.
After the harvest
Once the prompt disappears, the squad has a short window to decide whether to stay, loot the surrounding area, or extract. The decision should be made before the harvester moves, because the harvester is the slowest member of the group at that moment. Stalling in the open is the most common cause of lost harvests, and a disciplined squad treats the end of the animation as the start of a movement plan.
After the first extract, the squad should also note whether the cluster was shared or private. A shared cluster that respawns quickly is a recurring location, and a squad that tags it mentally will save a lot of map reading on the next run.
Crafting, healing, and trade uses
The prickly pear is a multi-role ingredient. It feeds consumable crafting, supports a small set of healing recipes, and acts as a barter item with several traders. Players who treat it as a single-purpose resource miss a lot of value, especially in long sessions where the trader rotation matters.
Consumable crafting
Pulp is the main input for a set of mid-tier consumables, including field dressings, makeshift bandages, and a short-duration stamina boost. The recipes are not expensive, but they require a fixed number of pulp per craft, so a squad that picks only one pulp every few runs will not be able to keep its consumables stocked. The pulp-to-consumable ratio is one of the design knobs that keeps prickly pear relevant across the mid-game, and it is also why the resource shows up in the same conversation as the medical and stamina trees.
Healing applications
Field dressings made from pulp do not replace a dedicated medical craft, but they close the gap between minor wounds and the next safe moment to use a real medkit. In solo play, that gap is often the difference between extracting with a full kit and losing the run to a slow bleed. In squad play, the same dressings let a teammate stay in the fight long enough to cover a rotation while the dedicated medic stabilises the next person.
Healing from prickly pear is most useful during the first half of a run, when medkits are still expensive to craft. Late in a run, the same pulp is often better spent on a stamina tonic that lets a slow squad catch up to a moving extract window.
Trade economy
Seeds carry the highest barter value per unit weight, and the rare drop rate keeps the price stable across extraction cycles. Pads and skin are cheaper but still useful, especially for players who want to clear inventory weight before extracting. Traders refresh their stock on a timer, and the prickly pear is one of the few plants that is consistently in demand across multiple traders, which makes it a reliable income source for cautious players.
The barter value of seeds also gives squads a reason to plan their extract point around a trader location. A seed-heavy run that ends near the right vendor can fund the next kit, while the same run that ends at a random extract point leaves money on the table.
| Output | Main input | Other inputs | Typical use | Skill floor |
|---|---|---|---|---|
| Field dressing | Pulp | Clean cloth | Stops minor bleed | Low |
| Makeshift bandage | Pulp, skin | Adhesive strip | Slows major bleed | Low |
| Stamina tonic | Pulp, seed | Purified water | Short sprint boost | Medium |
| Bulk trade | Pad | None | Clear weight, low credit | Very low |
| Rare barter | Seed | None | High credit, low volume | High |
The skill floor column is a planning hint. A new player can use field dressings and bulk trade without much risk, while stamina tonics and rare barter demand a more disciplined route and a sharper sense of when to extract. Recipes that combine two prickly pear ingredients, like the stamina tonic, are also a good test of whether a squad has its inventory under control.
Reading prickly pear as terrain design
From a design perspective, the prickly pear is a teaching tool. The plant is bright enough to read at a distance, slow enough to require a commitment, and valuable enough to justify a route. Those three properties make it a useful case study for designers who are building their own extraction or survival systems, and it is the kind of asset that the developers of Arc Raiders have pointed to in early design talks as a reference for future biomes.
For a closer look at how the resource chain fits into the broader extraction loop, the hands-on preview of Arc Raiders from Game Informer walks through several resource chains, including the prickly pear loop, and gives a useful external sanity check on the patterns described above. The preview covers the same harvest timing and inventory trade-offs that show up in repeated playtests, and it confirms that the asset is meant to be a deliberate commitment rather than a quick pickup.
Visual readability
The pad’s green stands out against the desert palette, and the ripe fruit adds a small colour accent that pulls the eye without breaking the world’s realism. Designers studying the asset should notice how the colour contrast is strong enough to guide players but soft enough to avoid UI-style pop. The trick is to keep the saturation below the threshold where the plant would compete with the actual UI. The prickly pear sits right at the edge of that threshold, and small saturation changes can push it from a useful marker to a distracting one.
Risk-to-reward pacing
The harvest time, the regrowth cooldown, and the rarity of seed together create a natural rhythm. A cluster is worth a short fight, a full field is worth a planned push, and a highland scatter is worth a casual loop. Designers can copy that rhythm by tuning three numbers: the harvest duration, the respawn timer, and the drop chance for the rare ingredient. None of those numbers need to be large, but they all need to be visible in playtest telemetry so the design team can see whether squads are taking the bait.
Player behaviour signals
Where players stop to harvest is a strong signal of where they feel safe. Designers can use that signal to balance the map, by either adding threat near over-harvested clusters or moving rewards toward neglected ones. Prickly pear clusters are useful markers for that kind of balancing pass, because the asset is large enough to track in telemetry without intruding on the player’s view. The same heatmap approach has been used on other gatherables in the game, and the prickly pear is one of the cleanest data sources the team has.
Common mistakes when working with prickly pear
Even experienced squads lose value to prickly pear by repeating the same handful of errors. The list below is not a rulebook, but it covers the mistakes that show up most often in extraction play and in early design passes.
- Harvesting in the open without a cover plan, which turns a quiet plant into a death sentence.
- Picking unripe pads before ripe fruit, which skips the seed drop and shortens the regrowth window.
- Splitting the cutting tool across the squad, which doubles the repair cost without speeding up the harvest.
- Filling the inventory with pads when only pulp feeds the useful recipes, which leads to a forced extract.
- Returning to the same basin every run, which trains rival squads on the rotation and burns the cluster’s regrowth.
- Ignoring the trader rotation, which leaves rare barter value on the table when a seed-heavy run ends near the right vendor.
Most of those mistakes share a single root cause: a squad that treats the plant as scenery rather than as a contested resource. Once the squad starts to plan around the timer and the cover, the mistakes tend to fade out on their own.
How the prickly pear compares with other desert resources
Arc Raiders ships with several desert gatherables, and the prickly pear sits in a specific niche. Comparing it to the more common options is the fastest way to understand why it deserves a slot in the route planner, and it is also the way the developers have described the resource in early design notes.
Yield versus risk
Some desert resources are fast to pick and almost worthless. Others are slow, rare, and very valuable. Prickly pear sits between those poles, with a moderate harvest time and a moderate yield that scales up only when the squad learns to target ripe clusters. That middle position is what makes it a useful training resource for players who are moving from solo runs to squad play.
Role in the recipe tree
Pulp feeds the consumable recipes that keep a squad in the field, while seeds feed the barter economy that funds the next kit. Other resources tend to specialise in one or the other. Prickly pear’s dual role is what keeps it relevant across many play styles, and it is one of the reasons the plant shows up in so many community route plans during the preview windows.
Map coverage
The plant’s placement bias toward south-facing slopes and dry washes gives it better map coverage than the rarer desert resources, but worse coverage than the cheap, fast pickups. A squad that wants steady income without long rotations can rely on prickly pear, while a squad that wants a quick credit top-up will lean on the cheap pickups instead. The two resource types also overlap on the map, which is why many runs end up mixing them by accident.
Adapting the prickly pear loop to a squad’s skill level
There is no single correct way to run a prickly pear loop. The same resource can support a cautious solo route, a disciplined duo plan, and a high-tempo three-player push, and the differences come from how the squad handles the harvest window. The subsections below describe the three most common shapes the loop takes in repeated playtests.
Solo play
A solo player should treat the prickly pear as a low-commitment loop. Pick only ripe clusters, skip the pads, and extract as soon as the inventory hits the pulp target. The loop is not about maximising value per run, it is about running the loop often enough that the small yields add up. Highland nodes are the best fit for this style, because the regrowth cooldown is short and the traffic is low.
Solo players should also avoid the south-facing mesa fields, because the open ground is too punishing without a second pair of eyes. The highland and ruin nodes are slow, but they are honest, and the income from pulp is enough to fund a basic kit cycle.
Duo play
A duo can afford a slightly riskier route. One player harvests while the other holds a long line of sight, and the pair rotates to the next cluster as soon as the first is empty. The duo style works best in mid-elevation plateaus, where the cluster density is high enough to justify a longer stay and the cover is good enough to keep the harvester alive.
The duo plan is also where seeds start to matter. Two players can keep a closer eye on ripeness, and the seed drop from a full plateau run is usually enough to cover a trader refresh.
Squad play
A full three-player squad can push the mesa edges, where the densest fields sit in the most exposed positions. The harvester stays on the cluster, one player holds the high ground, and the third patrols the most likely rotation path. The squad style is the only one that can clear a full mesa field in a single window, and it is the style that most often turns into a contested extract.
The squad plan also benefits from a shared inventory pool, because three players can split pulp, skin, and seed across their bags and reduce the per-player weight cost. That split is the most common reason a squad run extracts with a higher total yield than three solo runs of the same length.
How the prickly pear fits the wider Arc Raiders extraction loop
Arc Raiders is built around a loop of drop, gather, fight, extract, and the prickly pear touches every stage of that loop. The plant sets up the gather, feeds the fight through its consumables, and shapes the extract by encouraging careful inventory management. Designers who study the loop can use the prickly pear as a microcosm of the wider system, because the same tuning knobs that govern the plant also govern other resources and encounters.
Players who learn the prickly pear well tend to generalise that knowledge to other desert resources, and the same is true for designers who use the plant as a reference asset. The combination of readable visuals, tunable pacing, and clear recipe roles makes the prickly pear one of the most informative single resources in the game. The community route plans that have appeared during the preview windows all build on the same plant-first logic, which is a sign that the asset is doing its job as a teaching tool.
Field checklist for a prickly pear run
Before a squad drops into a prickly pear run, a short checklist helps keep the loop disciplined. The list below is a working baseline, not a rigid script, and squads should adapt it to their own play style.
- Confirm the cutting tool is repaired and the repair kit is in the inventory.
- Assign one player as the harvester, one as the overwatch, and one as the flanker.
- Pick a primary cluster zone and a fallback cluster zone in case the first is contested.
- Set an inventory target for pulp and a hard cap for pad weight.
- Plan the extract point before the first harvest, not after.
- Watch the trader rotation so a seed-heavy run ends near the right vendor.
- Leave the cluster while the regrowth cooldown is still running, so the next run has something to pick.
That list is short on purpose. Long checklists slow the squad down and add noise to the decision-making, and the prickly pear rewards squads that keep the loop calm and predictable. The plant is not a complicated resource, and the run plan should match that simplicity.
Frequently asked questions
What is the arc raiders prickly pear used for?
The arc raiders prickly pear is a harvestable desert plant that splits into pad, skin, pulp, and seed. Pulp feeds mid-tier consumable recipes, skin supports low-tier recipes, pads act as bulk trade material, and seeds are a rare barter drop that funds higher-tier crafting.
Where does prickly pear grow in Arc Raiders?
Prickly pear grows along south-facing slopes, inside dry wash basins, at the edge of mesa shadows, and in scattered highland scrub. The densest fields sit on south-facing mesa edges, while the safest clusters are in highland scrub and inside industrial ruins.
Is prickly pear the best healing resource in the game?
It is the best mid-tier healing resource, but it is not the strongest overall. Pulp feeds field dressings and makeshift bandages that bridge the gap between minor wounds and a full medkit, while higher-tier healing items come from rarer resources and dedicated medical crafts.
How long does a prickly pear cluster take to regrow?
The regrowth cooldown varies by elevation and biome. Low-elevation basins have the longest cooldown, mid-elevation plateaus sit in the middle, and highland scrub has the shortest cooldown. The exact timer is tuned per biome and can change with patches, so a squad should observe the local cooldown on its first run before planning a loop.
Should a solo player focus on prickly pear?
Solo players who want a steady, low-risk income can run a prickly pear loop through highland scrub, picking only ripe clusters and skipping the pads. The loop is not the fastest credit route in the game, but it is one of the most consistent, and it teaches the timing and inventory habits that generalise to other resources.
Does prickly pear respawn on the shared map?
Most clusters respawn on the shared map, which is the reason the resource supports contested routes. A small number of high-value clusters may be gated to private instances, depending on the live tuning, and players should treat the shared respawn as the default unless a cluster clearly behaves differently.
What is the rarest drop from prickly pear?
The seed is the rarest drop. It only comes from ripe fruit, and the per-harvest chance is low enough that a full mesa field may yield only a handful of seeds per run. Seeds are also the lightest and most valuable ingredient, which makes them the main target for a careful route.
Can prickly pear be used in squad loadouts?
Pulp-based consumables are useful across all three squad roles, and seeds are a clean barter item that any role can carry. The plant does not feed a role-specific recipe, so the squad usually treats it as a shared resource pool rather than a per-role item.
How does the prickly pear compare with other desert gatherables?
It sits between the cheap, fast pickups and the slow, rare resources. The harvest time is moderate, the yield is moderate, and the rare drop chance is meaningful but not extreme. That balance is what makes it a useful training resource and a reliable mid-game income source.
Is the prickly pear a good resource for new players?
Yes. The plant is readable, the harvest interaction is forgiving, and the recipes it feeds are useful from the early game onward. A new player who learns the prickly pear loop will pick up habits that transfer directly to more complex resources, and the low skill floor of the bulk recipes gives a safe way to clear inventory weight while learning the map.